

Enhances Visuals, provide series of modifications and additions to the game play, support WOR |
| Welcome Guest ( Log In / Register ) |
|
 |
Quick Lists Top RatedTutorials Living World Map G Ultimate beginner' Arrow scaling bug Raising Heroes max Simple Structure B Creating an asset. Making a simple Ma Quick and easy sno Proper Fire Arrow BFME1 AI Tutorial Mods The Dwarf Holds The Peloponnesian RJ - RotWK The Elven Alliance Helm's Deep Last H The Elven Alliance Special Extended E Kings of the West RC Mod The Wars of Arda Downloads BFME1 1.06 Widescr Enhanced W3D Impor Fudge's Map Pack LotR/BfME HD Logos Osgiliath Shellmap Crystals Of Ancien 2v1 Wold Converted BFME2 an The forests of Dru ROTWK animations f |
|||||||||||||||||||
 |
Register and log in to move these advertisements down Applying Normal Maps
This brief tutorial will show you how to apply normal maps to a BFME2/ROTWK model. Applying normals for BFME1 gives different results and uses a different method and will not be outlined here. For information on how to create a normal map, another tutorial dealing with this can be found here. Before you do anything, check to make sure your copy of Max is using the DirectX rendering mode. You can do this by going to the Customize menu in Max, then selecting Preferences, then the Viewport tab, then the "Choose Driver" button. Once this is set you can begin. First, load 3ds Max, and load your model. 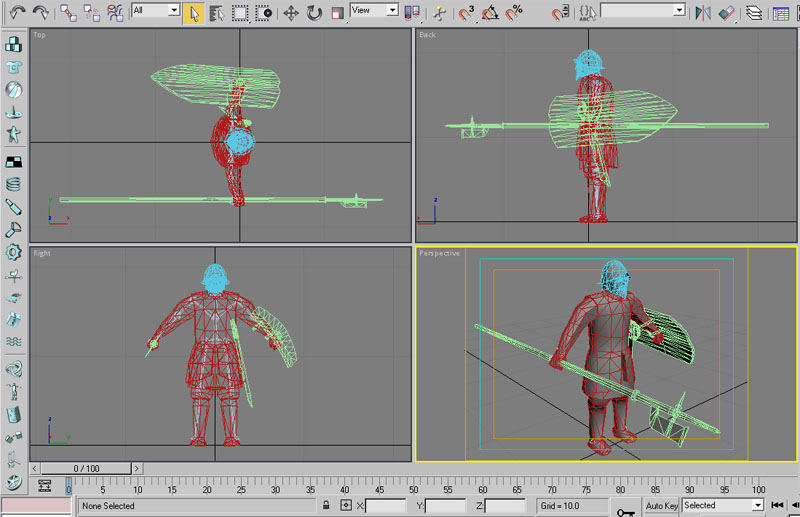 Hit M to open the material editor. 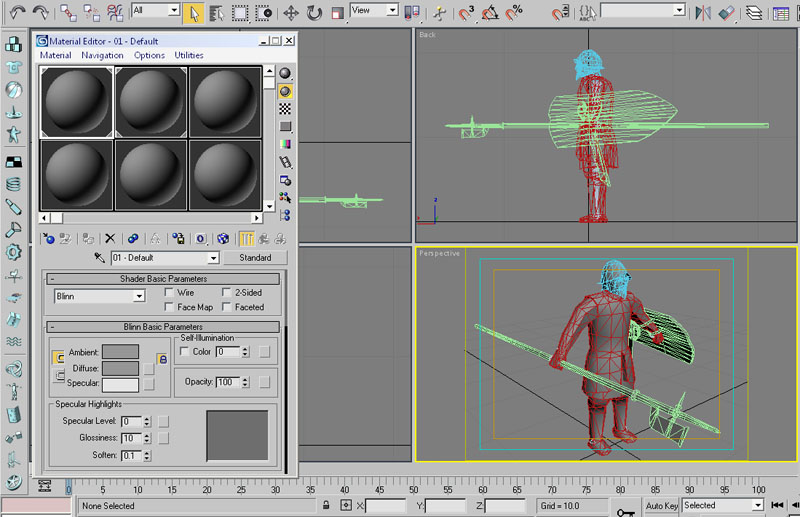 Select the mesh component you want to apply a normal map to and assign a blank material to it using the apply material button. 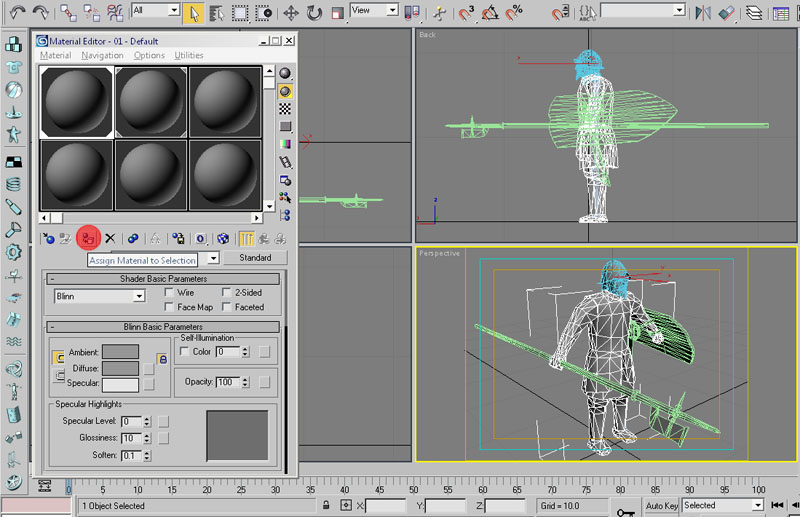 Click "Standard" to bring up the Material Browser - this allows you to select different types of material. 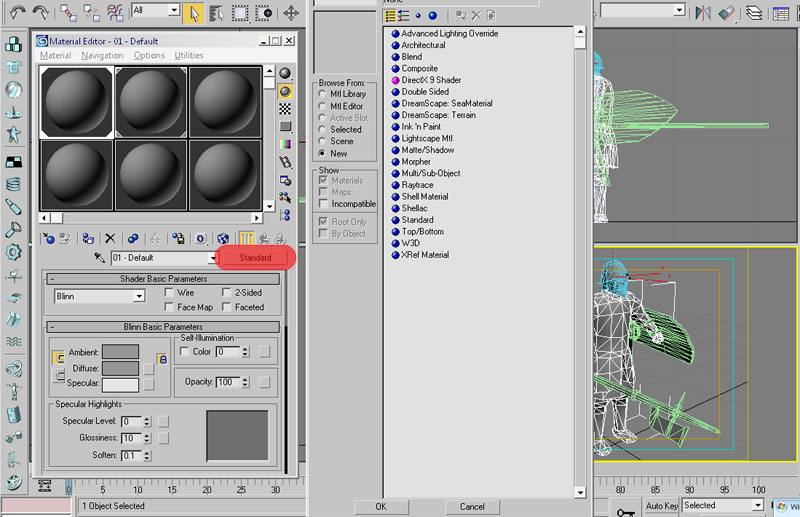 Select DirectX 9 Shader and click OK. 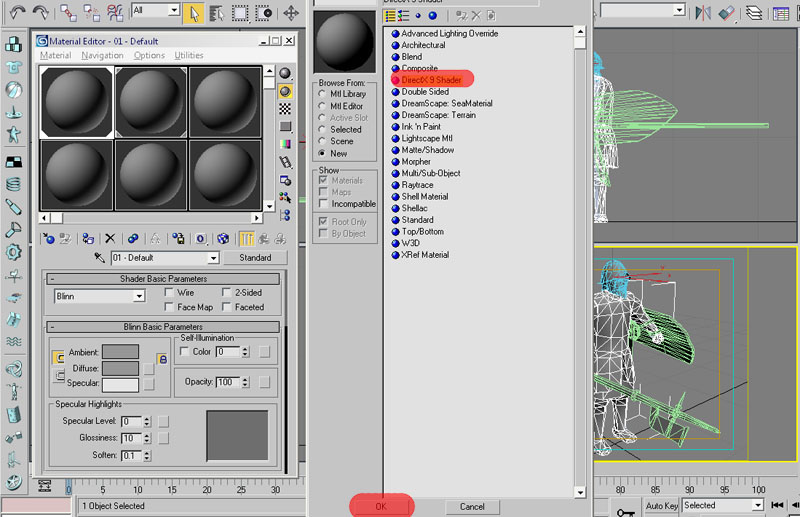 When prompted, discard the old material. 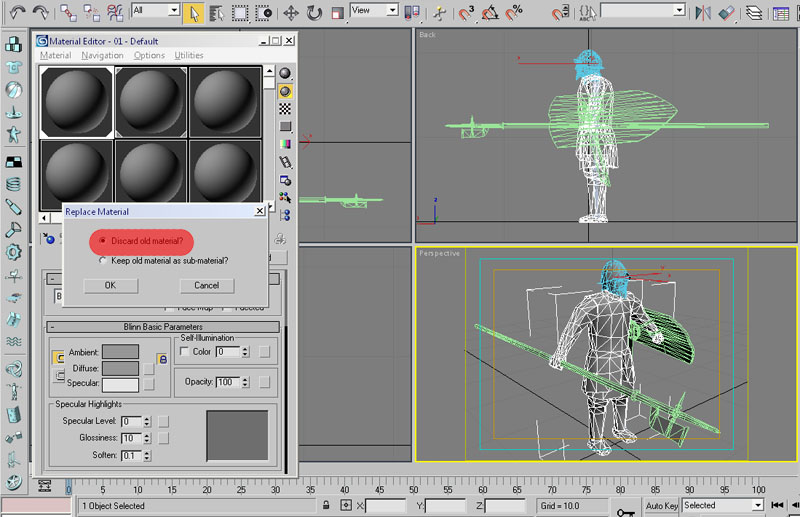 Under the newly appeared DirectX 9 Shader section, click on the file path. A browser window will appear. 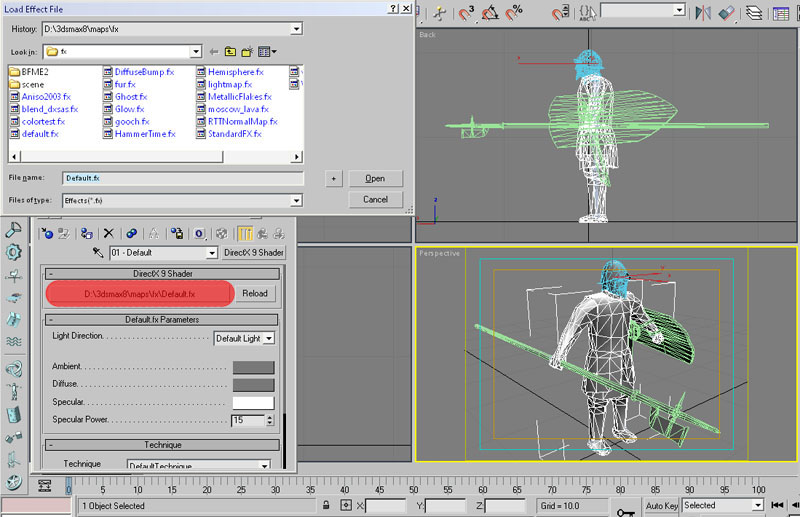 Navigate to the BFME2 directory under 3dsmax#/maps/fx/BFME2. 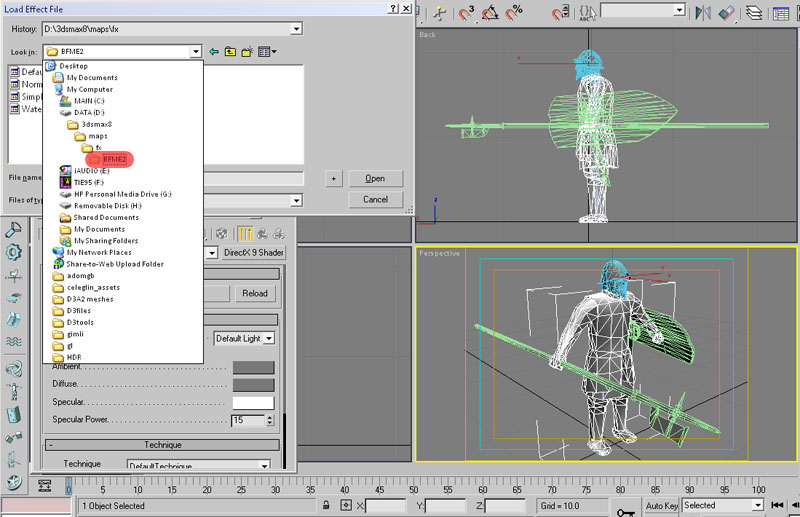 Select the file called NormalMapped.fx, and click Open. New sections should appear. 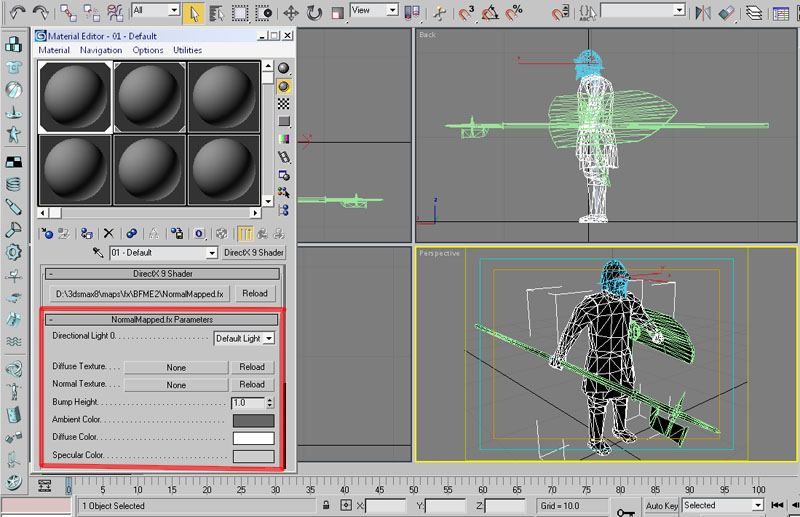 Now select Diffuse Texture (currently says "None"). This will open another browser window. 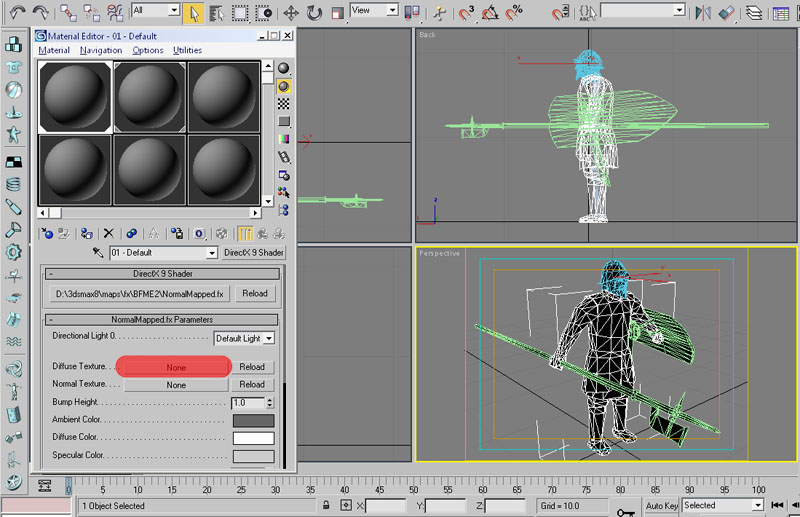 Navigate to your colour texture here and select it, then click open. 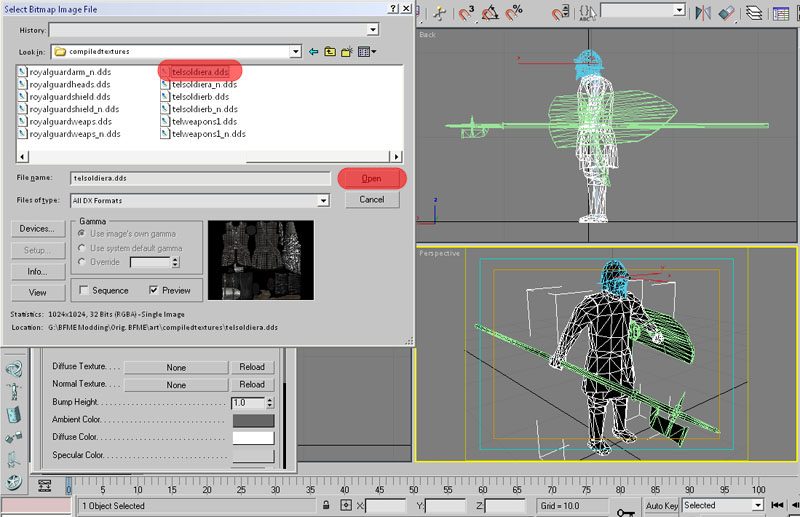 Now select Normal Texture. A browser will again open. 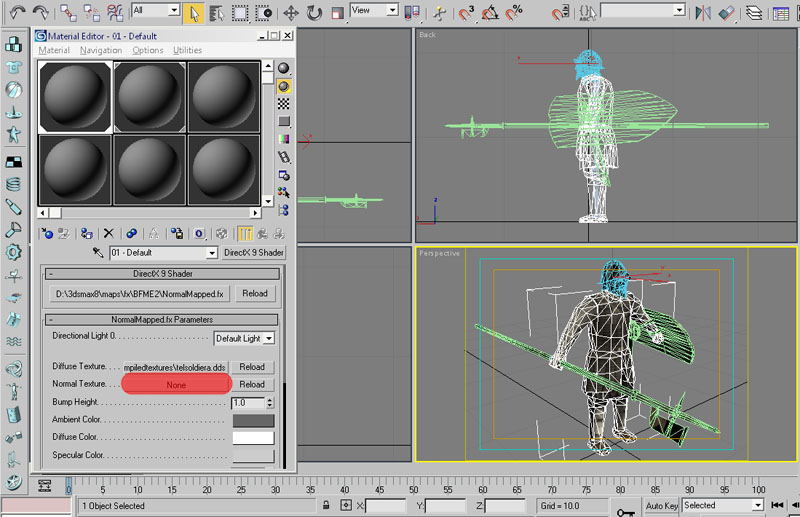 In the same way, navigate to your normal map that corresponds to the diffuse texture and open it. 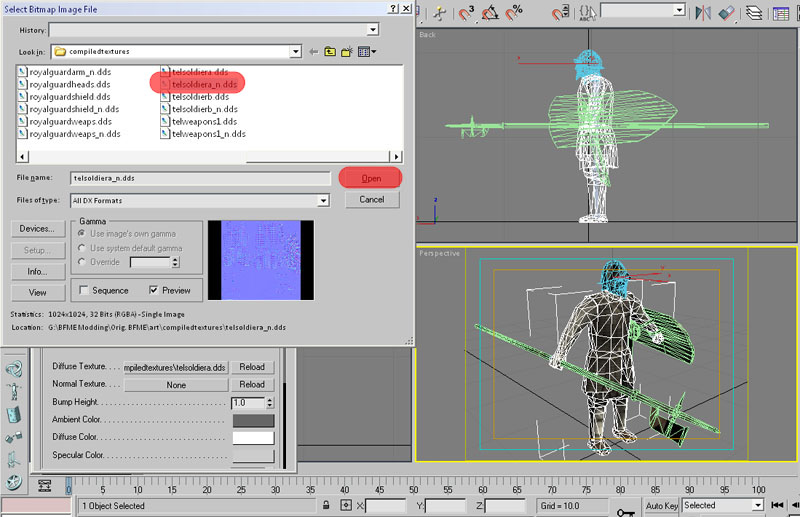 The normal map is now applied. Now I'm going to deconstruct a few of the parameters of the material for more advanced users. 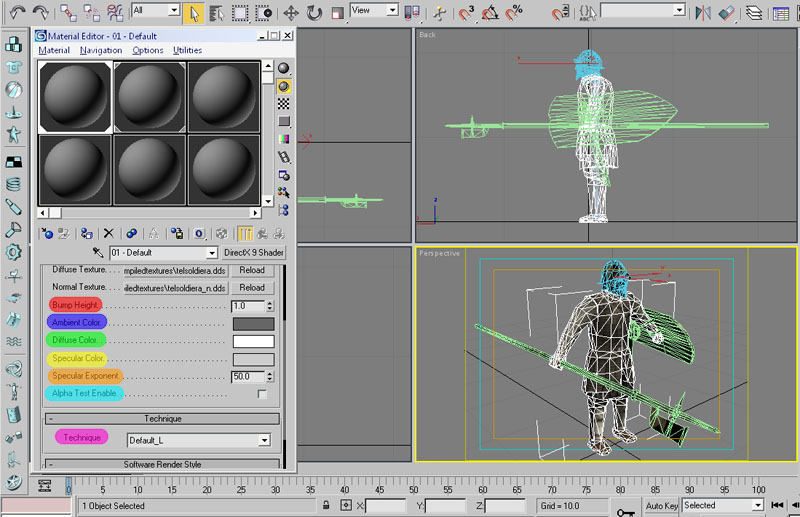 - Bump Height (in red) allows you to specify the apparent height of the normal map to emphasize depth. This should most often be left at 1.0, however if you feel that your material is not bumpy enough, increase it. If the model looks too overnormaled (ie. like a Halo 2 screenshot), turn it down a bit. - Ambient Colour (blue) lets you specify the lighting on the normal mapped areas. This is the colour that will be used for the fake shadows generated by the effect. It is best to leave this as the default dark grey for BFME applications. - Diffuse Colour (green) lets you specify what colour the light used to create the normal effect is. This should be left as is. - Specular Colour (yellow) allows the user to specify the colour of the highlighted areas on the normal map. The default is the best choice for BFME applications. - Specular Exponent (orange) sets the amount of higlighting used to emphasize edges on the normal mapped areas. Increasing this results in a plasticy look - not recommended. - Alpha Test Enable (cyan) ticking this box results in the engine using the alpha channel for transparency. This is the only way to use transperency with normal maps and is not ideal - as Alpha Test gives much uglier results than Alpha Blend. Avoid using alphaed materials with normal maps if possible - stick it on a different texture. - Technique (magenta) is related to LOD handling. I haven't tested this extensively yet. Once you are finished applying materials, you can export just like any BFME model. However, BFME's DirectX 9 shader handling is so bad that you should not apply the DirectX material until just before you plan to export. Therefore, do all your rigging first. Note that models exported using DirectX shaders will not work in BFME1 - the model will be invisible. Comments welcome - direct any questions to my forums in the T3A Showcase section. CommentsDisplay order: Newest first MattTheLegoman (Team Chamber Member) - Thursday June 6, 2013 - 8:25 Very thorough, it helped me apply normal maps from my limited knowledge of 3ds Max. Turin Turumbar - Saturday July 25, 2009 - 5:15 I always get an "Out of memory" error when klicking on the normalmap shader. Could someone help me? Lauri (Team Chamber Member) - Monday September 8, 2008 - 7:00 "Applying normals for BFME1 is a different process and will not be outlined here." |
 |
|||||||||||||||||||

"One site to rule them all, one site to find them, © All Rights Reserved Eric Edwards ©2013. |
|||||||||||||||||||||


 BFME 2
 ROTWK
ROTWK
