
A most anticipated mod that adds 4 new factions as well as editing the old ones |
| Welcome Guest ( Log In / Register ) |
|
 |
Quick Lists Top RatedTutorials Living World Map G Ultimate beginner' Arrow scaling bug Raising Heroes max Simple Structure B Creating an asset. Making a simple Ma Quick and easy sno Proper Fire Arrow BFME1 AI Tutorial Mods The Dwarf Holds The Peloponnesian RJ - RotWK The Elven Alliance Helm's Deep Last H The Elven Alliance Special Extended E Kings of the West RC Mod The Wars of Arda Downloads BFME1 1.06 Widescr Enhanced W3D Impor Fudge's Map Pack LotR/BfME HD Logos Osgiliath Shellmap Crystals Of Ancien 2v1 Wold Converted BFME2 an The forests of Dru ROTWK animations f |
|||||||||||||||||||
 |
Register and log in to move these advertisements down Simple Structure Build-up Animating
Introduction In this tutorial I will show you how to create a build-up animation. The animation will be basic, but the methods can be extrapolated to add more complexity. I will be using 3ds max 8 (the recommended software for BFME modeling) in this tutorial. STEP 1: Setting up your model To create a minimal amount of interesting animation, I seperate my structure into a bunch of objects. 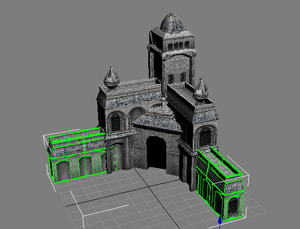 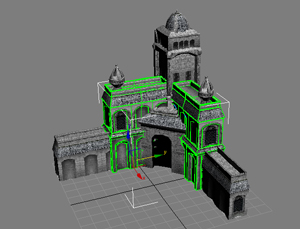 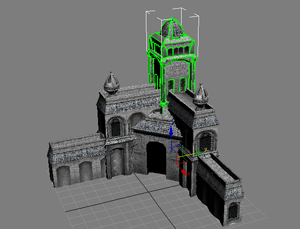 If you don't know how to seperate your model, I suggest following some of the other basic modeling tutorials available on this website. STEP 2: Setting up the animation parameters At the bottom right of your screen, you will see a small button (as indicated in the screenshot below). Pressing it will open the Time Configuration window. For a smooth animation in BFME, I suggest setting the length to 1000 frames. That means the animation will have a 1000 frames to play in full, preventing choppiness. 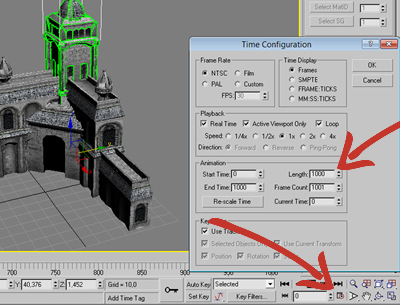 Press OK. STEP 3: Animating your model First, move your model down so it sits below the ground grid in 3ds max. Your model will move up through the ground ingame, so you can't have bits sticking out. 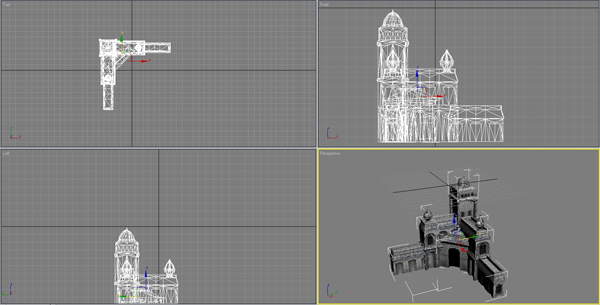 Press N. This will activate animation mode (no, I don't know the proper term). We will now start animating the model. Select the first piece of your model that you want to build up. Move it to right below the grid, then drag to a frame on the animation timeline (the bar that lit up red when you pressed N). For my first piece, I selected frame 250. Now move your piece up above the frame to where you want it to be. 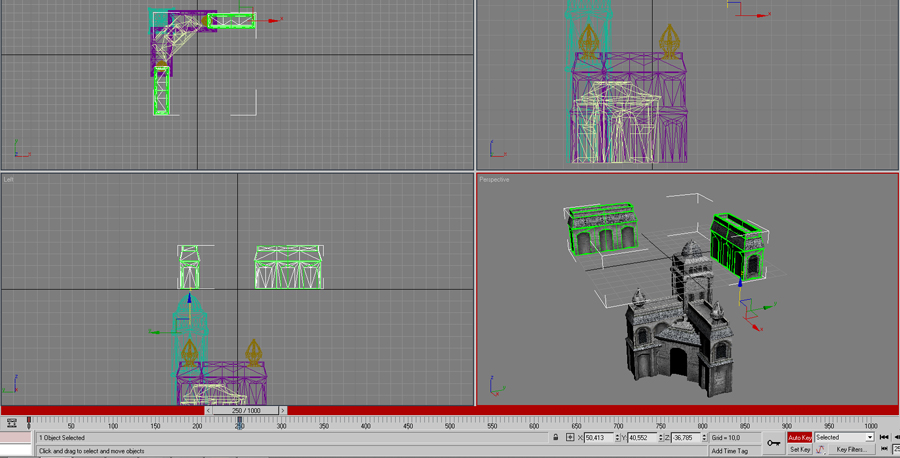 You will notice the creation of two so-called 'keys', the small red squares on the animation timeline. These represent the start and end of a given object's animation. My object started at 0 and ended at frame 250. You can move the animation bar back to 0 and press the play button in the lower right of the screen to preview the animation. Set the timeline to your latest used key (250, in my case), then select the second object you wish to animate. Move it to just below the grid, set then set the animation timeline to a later frame, 500 in my case. This will make sure the second object only starts animating once the first is done.  Repeat this for every other object. You can play it back to make sure everything moves as you intended it to. 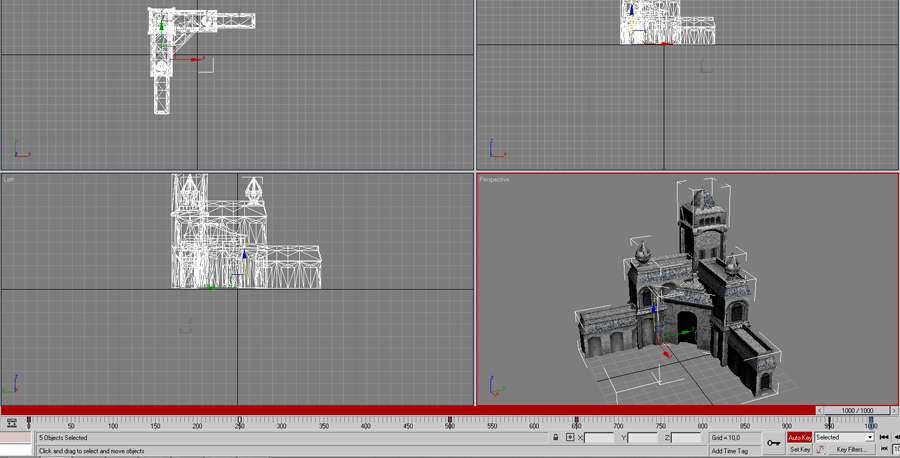 STEP 4: Exporting your model To use your animation ingame, you will need to export it using the correct W3D settings. Press the Utilities tab (the little hammer on the right side of the screen), click More, find W3D Tool, and click OK. These are the proper settings for animated structures: 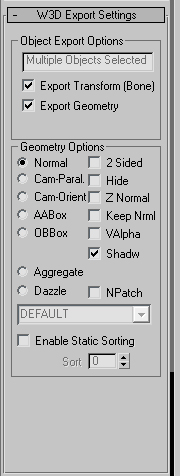 Now you can export your model. Export to W3D, and use these options in the Export Options screen: 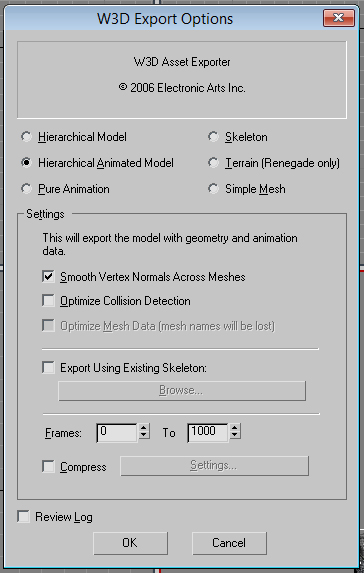 Afterwards, test it in W3D Viewer to make sure it works: 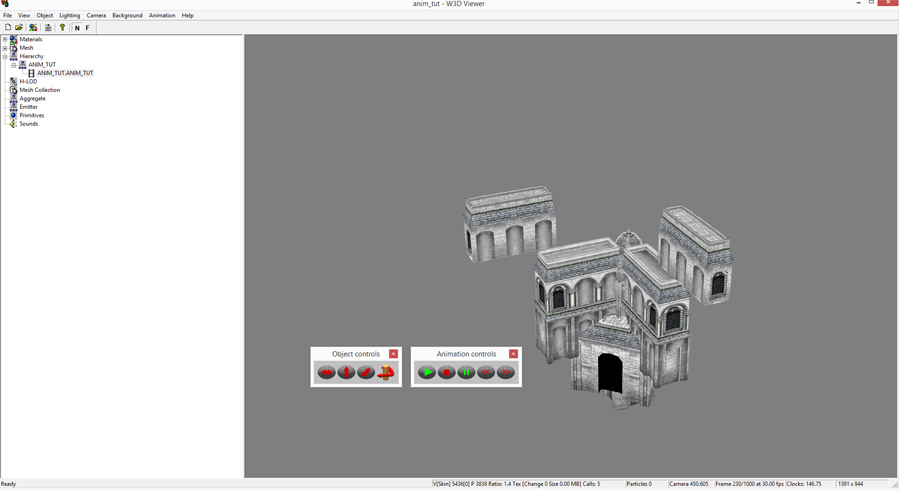 And that should be it. After a couple of tries you'll get more comfortable creating keys, after which you'll be able to add onto this simple method with more complex animations (walls turning upwards using the Select and Rotate gizmo, wooden beams and pillars to show construction in progress, etc). If you have any questions regarding this tutorial, please refer to our forums where I will be glad to answer them. CommentsDisplay order: Newest first marsarah89 - Sunday December 31, 2017 - 22:07 Thanks for the tutorial. It helped me understand build up animations better. However, I encounter the same issue: it does not work in-game. I added a new .ini file in the object folder and i'm referencing the new .w3d file in it, but nothing shows up in game. I'm using gmax/renx but I check the same settings when exporting the file to w3d. I know it is not a referencing issue from the .ini file, because if I overwrite my w3d file with an existing one that is already being referenced by the game, then my file does not work. Am I missing something when exporting? Thanks! deathloki - Monday January 2, 2017 - 8:03 hey, this is nice tutorial, i tried it and worked, but when i exporting from 3ds max and put it on the game, the building animation doesn't show up,it just dust animation that exist. or maybe there is something wrong with ini files? i already create various w3d building, but i just cannot create building animation, can you help me with this? |
 |
|||||||||||||||||||

"One site to rule them all, one site to find them, © All Rights Reserved Eric Edwards ©2013. |
|||||||||||||||||||||