
The ultimate map mod |
| Welcome Guest ( Log In / Register ) |
|
 |
Quick Lists Top RatedTutorials Living World Map G� Ultimate beginner'� Arrow scaling bug� Raising Heroes max� Simple Structure B� Creating an asset.� Making a simple Ma� Quick and easy sno� Proper Fire Arrow� BFME1 AI Tutorial Mods The Dwarf Holds The Peloponnesian� RJ - RotWK The Elven Alliance� Helm's Deep Last H� The Elven Alliance Special Extended E� Kings of the West� RC Mod The Wars of Arda Downloads BFME1 1.06 Widescr� Enhanced W3D Impor� Fudge's Map Pack LotR/BfME HD Logos Osgiliath Shellmap Crystals Of Ancien� 2v1 Wold Converted BFME2 an� The forests of Dru� ROTWK animations f� |
|||||||||||||||||||||
 |
Register and log in to move these advertisements down Giving palantìr images the parchment lookTutorial for
PALANTIR ART - PARCHMENT STYLE Introduction I have been making quite a lot of art for Battles of Gondor and other mods, and it has been requested that I shared my techniques with the rest of the community. I will now try to guide you step-by-step through my way of creating art for bfme. I'm using GIMP, as it is free and working just as good as Photoshop. However, I'm sure that also Photoshop users will find something of interest in these tutorials. Many people working for mods are trying hard to get that parchment look that EA put on their palantir images in bfme2. This tutorial shows one way of achieving this look, but remember there are many other ways of doing the same thing. This time, I wanted a picture for the Haradrim lancers. To distinguish them from different haradrim troop types, I decided not to base this picture upon the palantir image they have in bfme1. So I started out, as normal, with my parchment background (300*300 pixels wide).  Now I had to do a Google search. Eventually I found a picture from the New Zealand LotR parade. I copied it, and pasted it as a second layer in my image file. 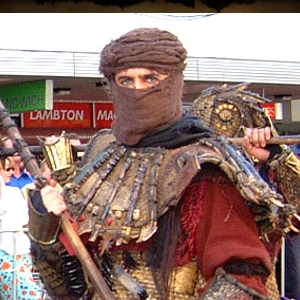 The time has come for cleaning the picture. With a combination of large and smaller circular brushes, I wiped away the background. The otherwise so useful option "Select contiguous regions" (a wand in the menu) wasn't any possibility in this case, as the background had so many different colours. In this part of the work, patience is of great importance. It might seem extremely boring, but for a person used to cleaning it won't take more than a minute. 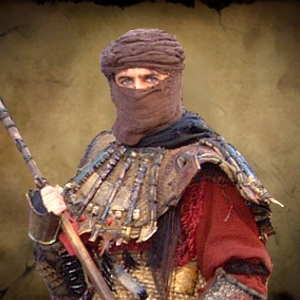 Since this image has an uncommon lack of shadows, I could take a little shortcut by using some GIMP effects. I marked the second layer Layer>Duplicate Layer Then I needed to do something about the edges. I marked the new layer Filters>Blur>Blur Filters>Edge-Detect>Edge I set it to "Smear", "Algorithm: Sobel" and "Amount: 2,0". After having pressed OK, I went Layer>Colors>Desaturate Layer>Colors>Invert Then I set the layer opacity to 25% and merged down. 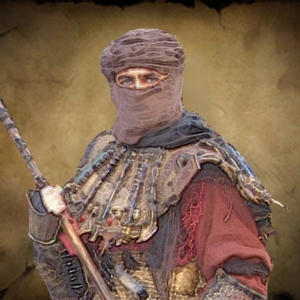 Now, time for the parchment look. Layer>Colors>Colorize I set "Hue: 28" and "Saturation: 40". 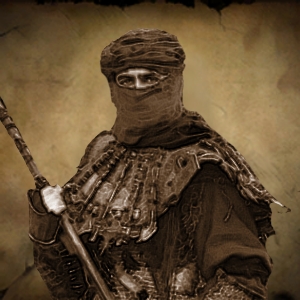 Once again, there is time for some brush painting. I painted the edges by hand, using a very small, circular and fuzzy brush while having zoomed in to 400%.  Erasing time. I used a really big (fuzzy) brush for this erasing, 60 pixels wide. I started out on "opacity: 100%" but lowered it to 25% as soon as I had got rid of the parts closest to the image edges. A combination of quick clicks and sweeps produced a nice tuning over from the parchment background. 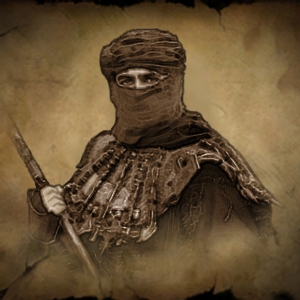 As I thought the image lacked some further parchment feeling, I thought I would better get rid of the great contrasts. Layer>Colors>Brightness-Contrast I set contrast to -75. As the picture turned gray, I had to colorize it again. Layer>Colors>Colorize As before, I set "Hue: 28" and "Saturation: 40". The only difference from the last colorization is that I also set "Lightness: 20". After this, I decided my palantir image was finished. I resized to 200*200 pixels and saved it as .jpg with maximum quality. Here's the final version: 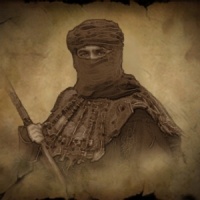 Note - what you should actually do is resize to 192*192px, as this is the size that EA uses for their images. Then, either download the full blank portrait .tga file, or use the following image to add an alpha channel to your original image (make sure to resize it to fit): 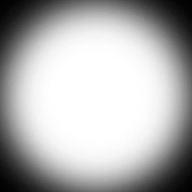 Credits
CommentsDisplay order: Newest first | Page: 1, 2 Taralom - Wednesday June 6, 2007 - 9:16 thanks for the tutorial. it will definately help me jimiojoe - Sunday April 15, 2007 - 9:50 waheyyy gooood straight forward tutorial, loads of people wanna do this Caluadan - Sunday April 15, 2007 - 0:26 *Fixed, the green button pressed :P Caluadan - Wednesday April 11, 2007 - 14:07 Why doesn't this article show up when I'm not logged in? Bart (Administrator) - Tuesday April 10, 2007 - 10:31 Nice tutorial, really helpful. I know some "pencil drawing" tutorial from the internet, but this one is specifically written for this so much better |
 |
|||||||||||||||||||||

"One site to rule them all, one site to find them, © All Rights Reserved Eric Edwards ©2013. |
|||||||||||||||||||||||


 BFME 2
