
The final battle between the Alliance of Men and Elves and Mordor. |
| Welcome Guest ( Log In / Register ) |
|
 |
Quick Lists Top RatedTutorials Living World Map G Ultimate beginner' Arrow scaling bug Raising Heroes max Proper Fire Arrow Creating an asset. Simple Structure B Making a simple Ma Quick and easy sno Making patrols nea Mods The Dwarf Holds The Peloponnesian RJ - RotWK The Elven Alliance Helm's Deep Last H The Elven Alliance Special Extended E Kings of the West RC Mod The Wars of Arda Downloads BFME1 1.06 Widescr Enhanced W3D Impor Fudge's Map Pack LotR/BfME HD Logos Osgiliath Shellmap Crystals Of Ancien 2v1 Wold The forests of Dru Converted BFME2 an ROTWK animations f |
|||||||||||||||||||
 |
Register and log in to move these advertisements down Leather Skinning Tutorial
Leather as a material is quite common in LOTR. It is strong, can be rigid or soft, and is relatively easy to make. Due to it's properties, it makes decent, flexible armour for either fast skirmish troops (Rangers of Gondor) or cheap, common armour for muster troops such as the peasants of Rohan. Sooo.. you may be making a lot of it. It's different method of highlighting makes it unique, it has an almost plastic sheen to it and does not have any stitching.
I'll walk through the steps of making a leather chestplate and skirt for a Rohan Peasant. As such, it will be based off the Peasant skin., but pay no attention to it, we'll just be focusing on the leather area. As such, the texture layout is already done and there is no need to meticulously make sure everything is in the right place. It also means that we are only drawing half of the chestplate. so keep that in mind. Also this peasant has already been edited, so ignore the rather bad old version of the skin. Chest Open up rupeasant01.dds in Photoshop. Now, save as a .psd file in the directory of your choice. Make sure you are indeed operating on the psd file, and we can commence. You'll probably want to resize the file to 256x256 pixels first. Then, create a new layer, name it "shirt". On this layer, use the paintbrush with hardness 100% and a variety of sizes to draw over the topof the peasant's body. You'll want to use a medium brown for this, with perhaps a tint of red. The colour is dependant of course on the origin of the leather, and is variable. The leather here is not too complex, there are no layers or large overlapping straps. first, however, the edges need to be defined. Do this by using the burn tool to etch a line long the edge of the armour. Midtones, a brush of size 1, and expose 45 are a good place to start. This is the stitching line. Further define it using a dodge brush on highlights, going along the edges of the dark area you just burned.  Next, we draw in the highlights. These are done mostly by feel, because I'm doing this without references. Greek armour was made of hardened leather, so you could try a similar style. I will simply give an overview of the methods. First, a medium dodge brush with no hardness and a low exposure can be used to highlight areas that would... be highlighted. For example, the upper chest, and the lower chest to a lesser extent. The centre of the chest will also have a more concentrated highlight than the edges which would be recessed into the armpit areas. My design will be a bit ribbed, like the Spartan design, so it will have a corresponding ribbed highlight pattern. 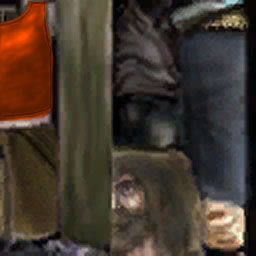 Highlights must always be mirrored with shadows. To do this, use burn with an exposure of around 20%, set on highlights, to shade dark areas. This includes complementing highlighted areas, shadowing under the armpits, and creating the illusion of depth along the border of the chestplate. This is all done with low hardness brushes with sizes varying between 3 and 21  Although the chestplate now looks decent, it still lacks a couple of elements that will make it stand out. Leather such as this is highly creased when bent, so using burn and dodge we can create dents and folds. Hard, small (1-3) brushes are useful here. I suggest relatively low exposure levels, so that you can layer the burning/dodging.  Now, the saturation has been amplified by the dodge. Dodging in Hilghlight mode tends to do that. So, grab the Sponge brush, set it to desaturate at 10% and dab away a bit of the excess colour. Once done, go to the Hue/Saturation panel (Ctrl+U). Change the Hue by +2, the saturation by -15, and the lightness by -35. The armour may need to be re-dodged a tiny bit. 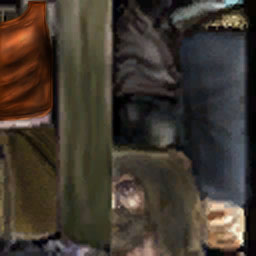 That concludes the leather chestplate. Of course, for realism, you need to add straps to the sides... since they are leather straps, I'll quickly outline the procedure. |
 |
|||||||||||||||||||

"One site to rule them all, one site to find them, © All Rights Reserved Eric Edwards ©2013. |
|||||||||||||||||||||


