Ridder Clan Mod 1.07 |
| Welcome Guest ( Log In / Register ) |
|
 |
Quick Lists Top RatedTutorials Living World Map G Ultimate beginner' Arrow scaling bug Raising Heroes max Proper Fire Arrow Creating an asset. Simple Structure B Making a simple Ma Quick and easy sno Making patrols nea Mods The Dwarf Holds The Peloponnesian RJ - RotWK The Elven Alliance Helm's Deep Last H The Elven Alliance Special Extended E Kings of the West RC Mod The Wars of Arda Downloads BFME1 1.06 Widescr Enhanced W3D Impor Fudge's Map Pack LotR/BfME HD Logos Osgiliath Shellmap Crystals Of Ancien 2v1 Wold The forests of Dru Converted BFME2 an ROTWK animations f |
|||||||||||||||||||
 |
Register and log in to move these advertisements down How to create authentic looking mini-maps
How to create authentic looking mini-maps By m@tt (aka. mh_gollum) Welcome to my first tutorial. You may have seen a tutorial on how to do this by Rohara over at worldbuilder.org, however that just uses photoshop effects and never really worked for me. This is how I do it... What you need: Two options to start with: Open a new document in photoshop sized 512x512px. Copy in the image from one of the options chosen above. I have used a overhead screen shot of my map, Old Fords of Anduin: 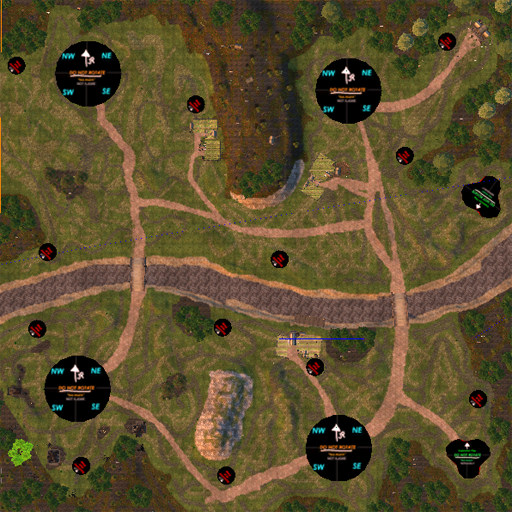 Create a new layer, select it, then select the pencil tool of width 4px and colour black. Draw round the most prominent features of the map, such as mountains and rivers. 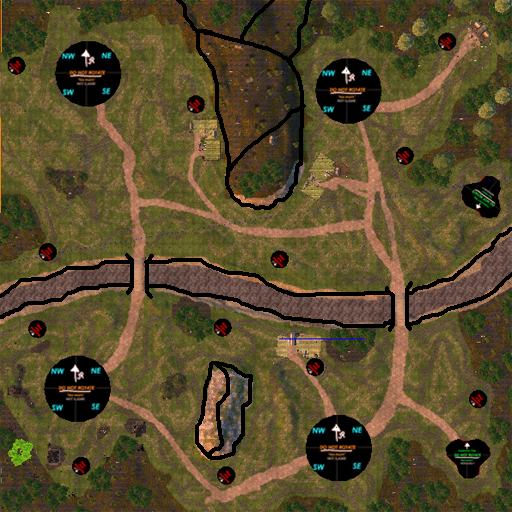 Next you need to emphasise the mountains and rivers. If you look at EA mini-maps, they do this. For the mountains, add sets of lines using a load of 3px anti-aliased lines. For the rivers, you have to make a arrow head shape using either a 2px pencil or 2px line without anti-aliasing, then copy loads of them all over the river. Try to clump them into groups of two and three like in this picture: 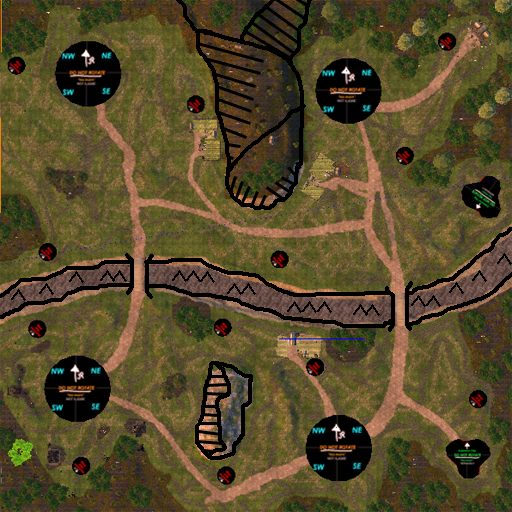 Now create a layer below everything bar the original image. Go back to the one with the rivers on and use the magic wand tool to select all areas of water. Now go to the new layer and fill all the areas with black. Set the opacity of this layer to 20%.  Next you should add in the rest of the lines, such as for paths and, if you want, wooden areas. Use a 2px pencil for this. 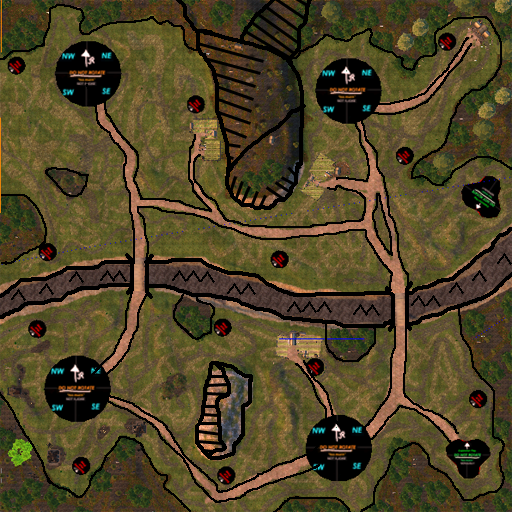 Now create a new layer above the original image and below all the rest and fill with white. Press CTRL+SHIFT+E to merge everything. 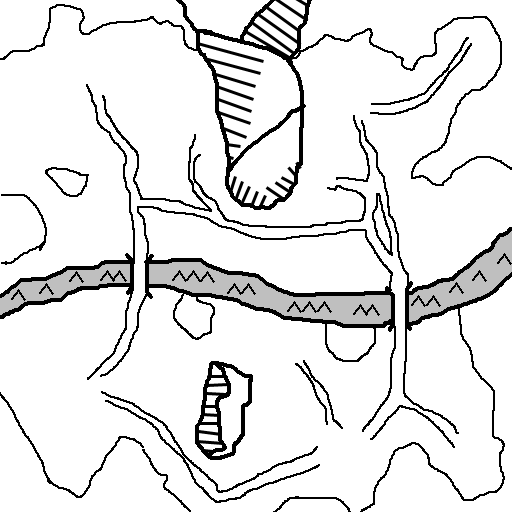 Now flip the image vertically and invert the colours by pressing CTRL+I. Then press CTRL+A followed by CTRL+X to cut everything. Go to resize image and resize to 128x128px. Now select the Channels tab and create a new channel and call it Alpha 1 (named by default). Paste (CTRL+V) into this new channel and resize the image to fit. 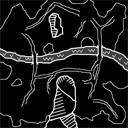 Now go to the RGB layer and fill it with the colour #4c2c01 which is a brown colour. This means that the image is just this colour, except for the alpha layer. 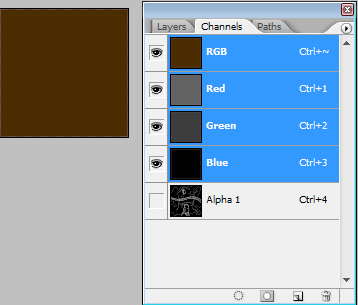 You'll notice that the image is slightly transparent round the edge. That can be sorted by going back to the Layers tab, creating a new one under the main one, and fill with the brown colour. Then press CTRL+SHIFT+E to merge. Now save as a Targa (.tga) file and call it yourmap_art.tga and you are done. Now test it out in game: 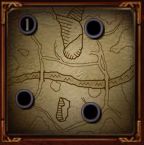 CommentsDisplay order: Newest first | Page: 1, 2 lycan - Saturday November 24, 2007 - 8:08 i have a cheat version for gimp. lacrossman930 - Sunday November 18, 2007 - 9:40 man this is hard i have gimp and paint can anyone make a tutorial for GIMP? MotWlRimli - Thursday July 19, 2007 - 14:31 Very nice tutorial, helps very much. {IP}Sauron - Wednesday June 27, 2007 - 6:13 way better than that tutorial on worldbuilder.org :P m@tt (Team Chamber Member) - Monday June 25, 2007 - 14:21 Done, eventually :P Bart (Administrator) - Monday June 25, 2007 - 7:37 are you going to put the new one at the bottom? ;-) snoopyzero - Sunday June 24, 2007 - 12:42 very very helpful thank you mh^^ Bart (Administrator) - Sunday April 29, 2007 - 15:46 can you replace the old image at the bottom some time? i'd really like to see the new one working Feudal_Knight - Wednesday April 25, 2007 - 16:48 looks good to me... nice work ;) |
 |
|||||||||||||||||||

"One site to rule them all, one site to find them, © All Rights Reserved Eric Edwards ©2013. |
|||||||||||||||||||||