

Six new factions. Controle any of the races of man that participated in the War of the Ring. |
| Welcome Guest ( Log In / Register ) |
 |
Quick Lists Top RatedTutorials Living World Map G Ultimate beginner' Arrow scaling bug Raising Heroes max Proper Fire Arrow Creating an asset. Simple Structure B Making a simple Ma Quick and easy sno Making patrols nea Mods The Dwarf Holds The Peloponnesian RJ - RotWK The Elven Alliance Helm's Deep Last H The Elven Alliance Special Extended E Kings of the West RC Mod The Wars of Arda Downloads BFME1 1.06 Widescr Enhanced W3D Impor Fudge's Map Pack LotR/BfME HD Logos Osgiliath Shellmap Crystals Of Ancien 2v1 Wold The forests of Dru Converted BFME2 an ROTWK animations f |
||||||||||||||||||||
 |
Register and log in to move these advertisements down Scratch Modeling a Human
This tutorial presents a number of pictures showing the flow of work that I use to model humans and humanoids. I open up 3ds Max and a new file. I create a basic 8-sided cylinder in the viewport, because that's roughly the shape of the human body, however, you could also start with a box, or a 6-sided cylinder if you really wanted to keep things low poly. 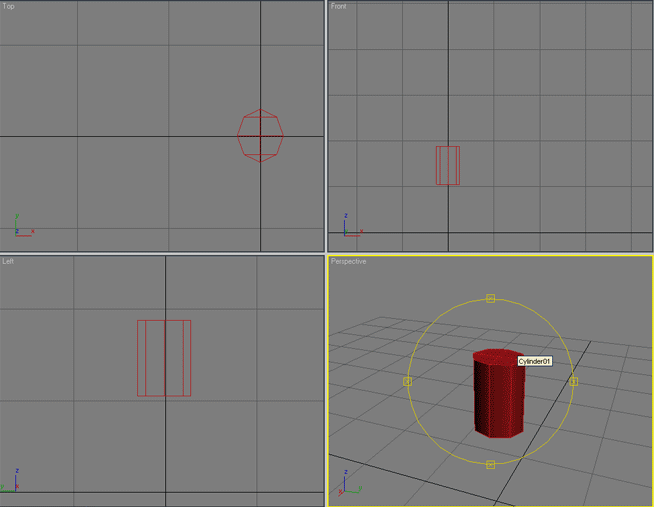 Half of the cylinder is deleted, because the human body is symmetrical and I only want to model half of it. 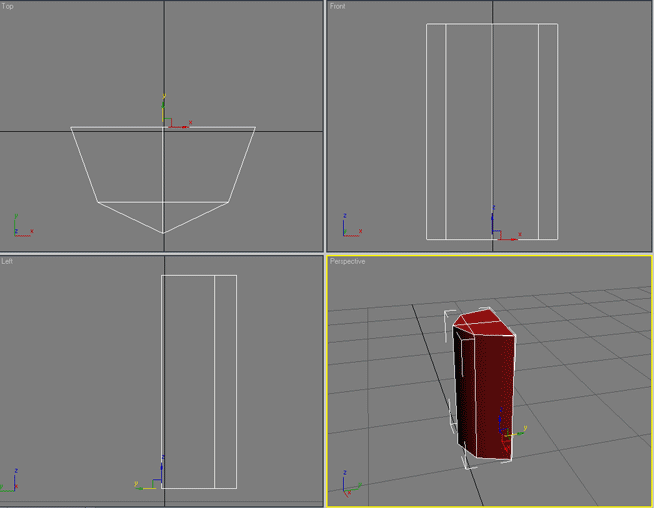 Then using the mirror tool, I copy the cylinder. Using Instance makes sure any changes to the left cylinder will immediately show up on the right cylinder. 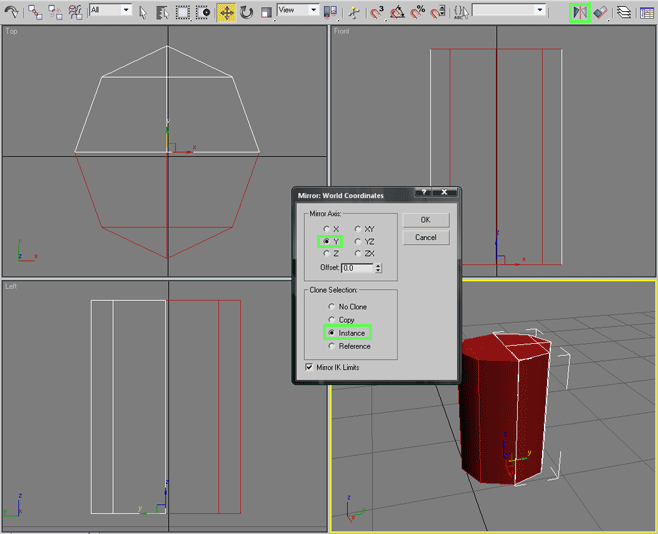 Next, I slice in some new segments, which I will use to define the chest 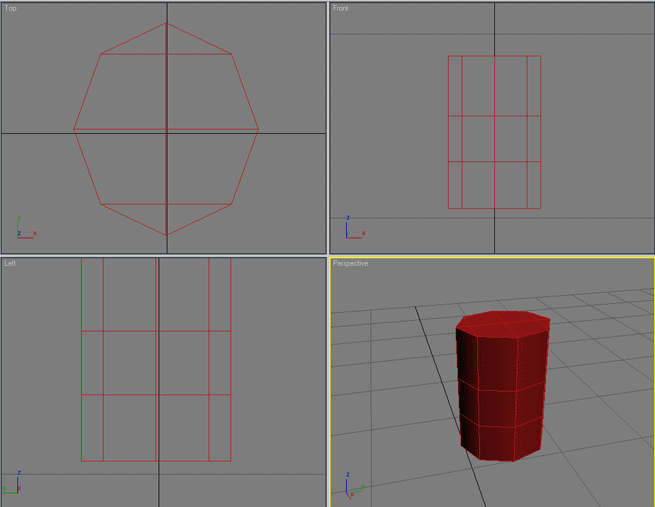 These segments are then shaped into a rough chest shape by vertex manipulation. 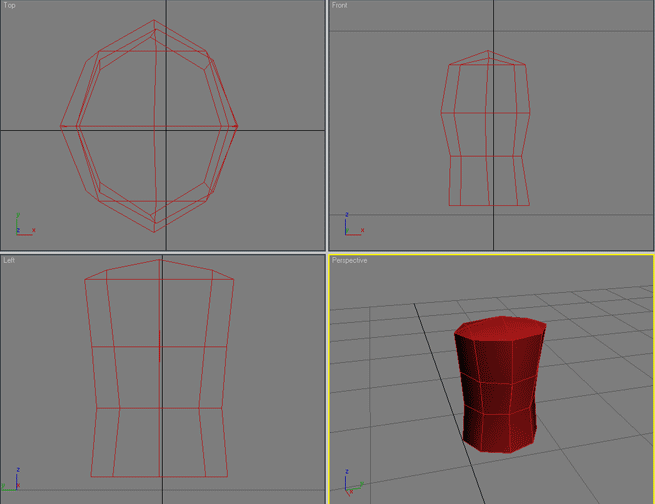 Next I cut another row of vertices at the top of the body, then move them into position to further define the body. 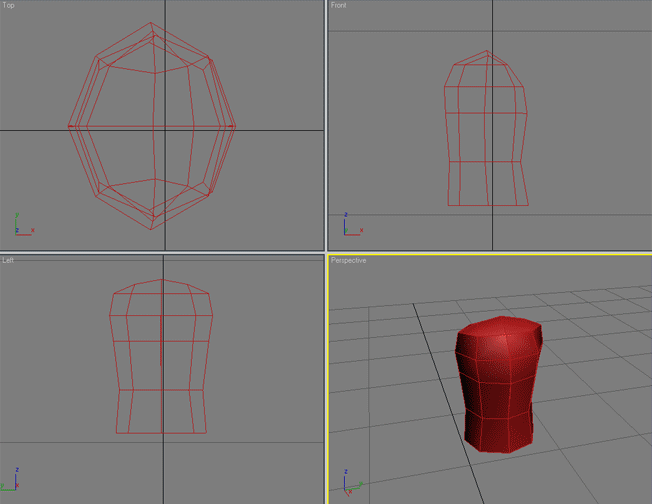 Next I extrude the bottom of the chest several times to form the armoured skirt, in this case it will be chainmail. It is then shaped. 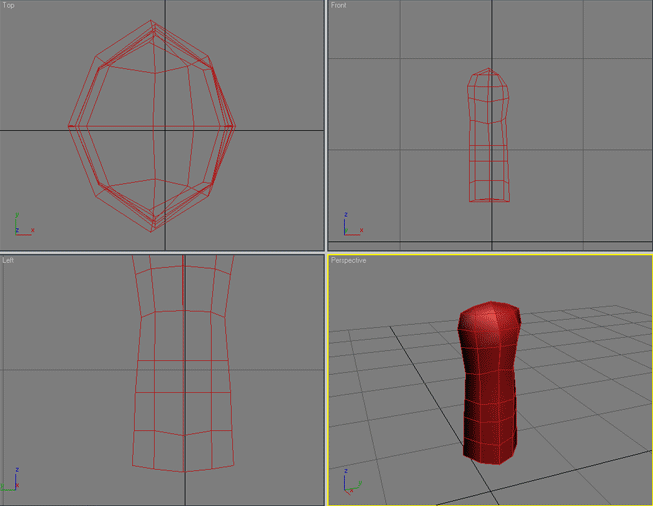 Here I cut a new edge down the side of the body with the cut tool. The purpose of this edge is rounding - this stage is irrelevant if polygon conservation is important. 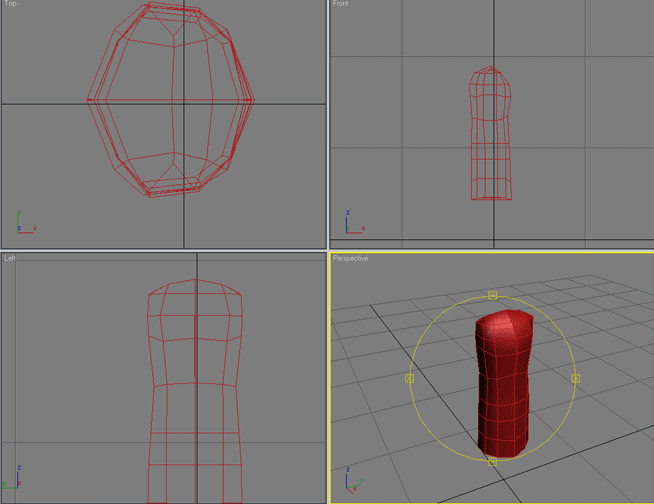 Then I cut another line between the two edge edges. The point of this line is to create the arm extrusion point in the correct shape. You'll notice the two polygons that I want to use on the image - if taken together they have a total of 6 vertices, which will make for a 6 -sided arm, which is a good number. 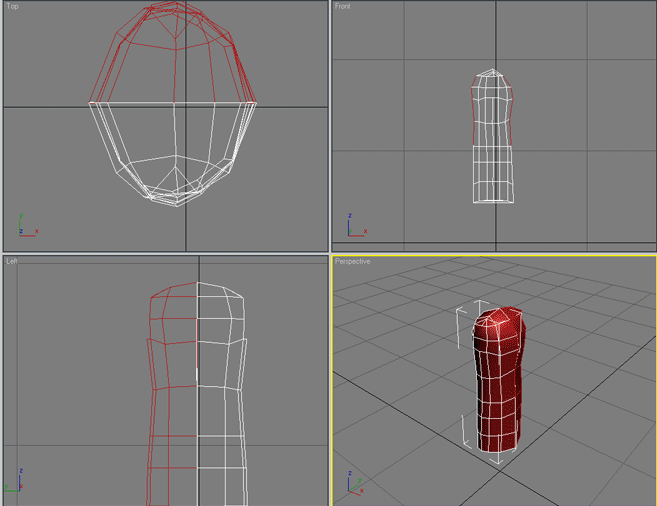 Now I extrude the arm polys. For BFME, it can be important to check the arm length vs. the skeleton you want to use, as some BFME models have weird proportions. That will ensure the animations look decent 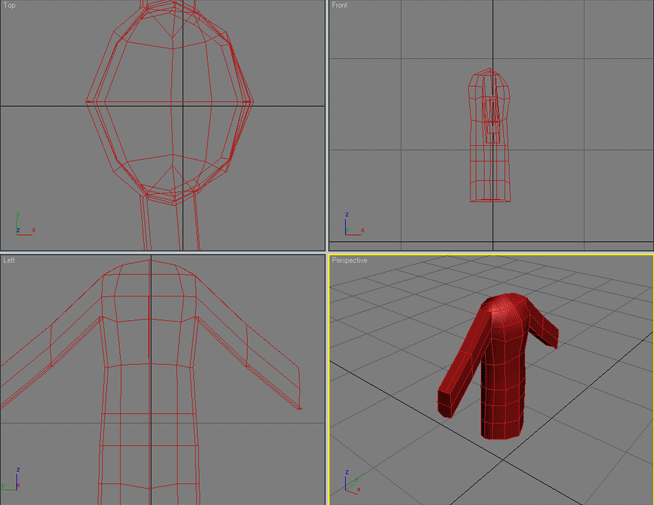 Now the arms are shaped into hexagons using the extra vertices. 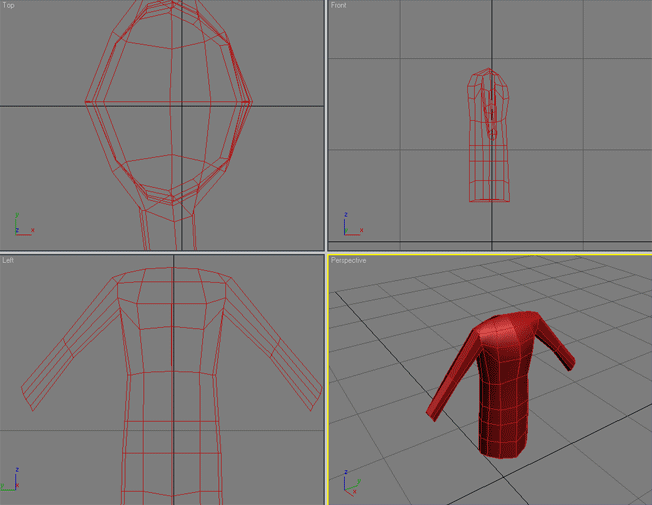 Using again the cut tool, I then place the important bendy bits of the arm, defining the forearm and the shoulder. 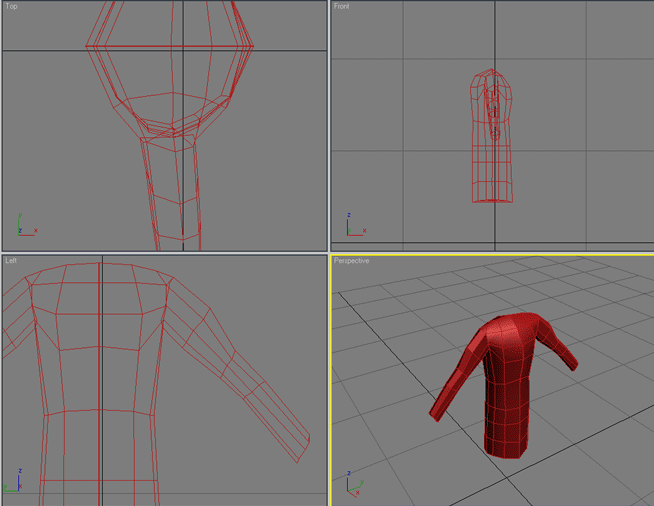 These are then shaped in the appropriate way, with more cuts to define the muscle or sleeve. 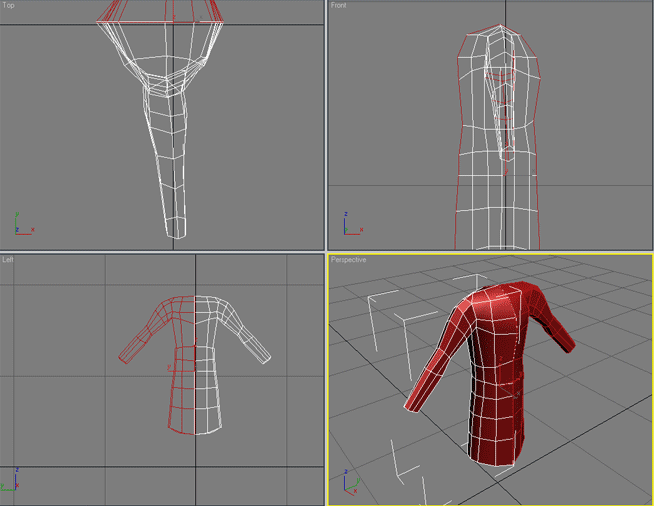 This is a simple cutting of a neck hole. I attacked it with the cut tool and then deleted the inner polys. If you wanted a neck, you could instead extrude the cut polys. 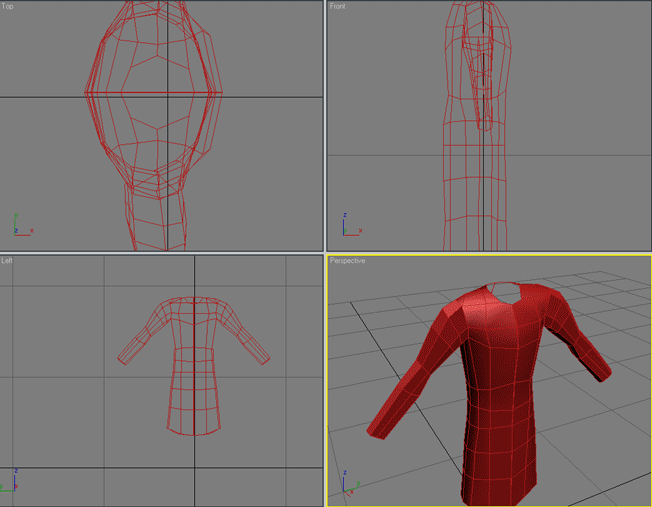 If you want a collar, extrude the neck edges. 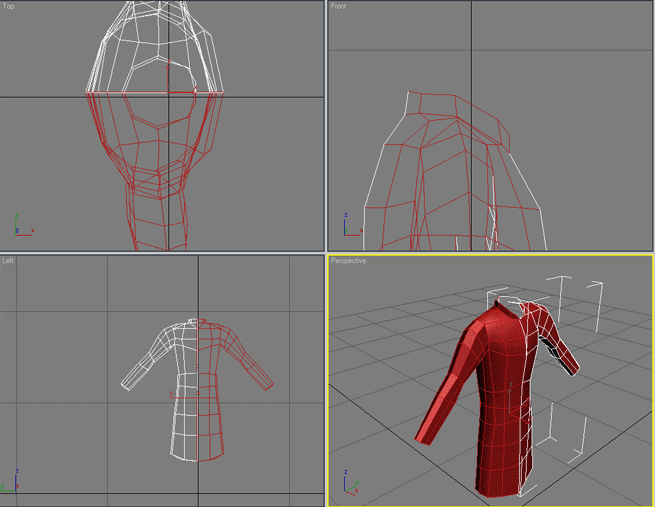 CommentsDisplay order: Newest first | Page: 1, 2 modboy451 - Thursday November 10, 2011 - 17:34 Thank you Nert... I found this very helpful and my guy is turning out great :D compiled with spline modeling all i got left is the shield and the head :D hiloes - Friday July 31, 2009 - 21:24 ok so i just finished my model wats next? be the way this was a great tutorial very helpful Rainwizard6 - Tuesday July 28, 2009 - 19:38 This is extremely fascinating and the final product looks amazing as well. Im just a beginner but man would I kill to be able to do that. Very nice job. I'll have to give this a try. LotrCrushah - Wednesday February 27, 2008 - 21:07 Nice Tutorial... Ill keep this in mind. Nertea (Team Chamber Member) - Saturday December 8, 2007 - 14:50 It does, but this is really specifically for 3ds max here, which does handle polys that have up to hundreds of sides quite well. I didn't cover it in the tutorial, but the final model actually has all those extra polys target welded to the sides, so as to cut down numbers. Lord of the Rings Junkie - Thursday December 6, 2007 - 16:19 Dang, hands are tricky... I think I made it okay, though. :) As long as you have those extra vertices in the wrist from those 2 lengthwise loop cuts, why not round it out a bit so it isn't so blocky? Guess Who - Friday August 31, 2007 - 1:52 i cant split my body shape i can mirror but not cut why (im using Gmax and RenX) Guess Who - Wednesday July 11, 2007 - 7:09 damn thats heaps good i wish i could model like you nertea your like a modelling legend. Bart (Administrator) - Friday June 29, 2007 - 8:52 updated. i think Nertea just forgot it in his hurry m@tt (Team Chamber Member) - Friday June 29, 2007 - 5:01 When is the second page going to be updated? The pictures exist but they haven't been added to the article. |
 |
|||||||||||||||||||

"One site to rule them all, one site to find them, © All Rights Reserved Eric Edwards ©2013. |
|||||||||||||||||||||