

Lord of the Rings , Quenta Silmarillion, Dunedain, The Hobbit and Westernesse |
| Welcome Guest ( Log In / Register ) |
|
 |
Quick Lists Top RatedTutorials Living World Map G Ultimate beginner' Arrow scaling bug Raising Heroes max Proper Fire Arrow Creating an asset. Simple Structure B Making a simple Ma Quick and easy sno Making patrols nea Mods The Dwarf Holds The Peloponnesian RJ - RotWK The Elven Alliance Helm's Deep Last H The Elven Alliance Special Extended E Kings of the West RC Mod The Wars of Arda Downloads BFME1 1.06 Widescr Enhanced W3D Impor Fudge's Map Pack LotR/BfME HD Logos Osgiliath Shellmap Crystals Of Ancien 2v1 Wold The forests of Dru Converted BFME2 an ROTWK animations f |
|||||||||||||||||||
 |
Register and log in to move these advertisements down Hex Editing Models
Changing Forged Blades Color For this example we will be changing the forged blade color on the gondor soldier to a variety of colors. Why would you want to do this? Well, if you want to uniformly change the forged blade colors for all EA models without having to rebind and spend days of work, here you just change a small value and your done. 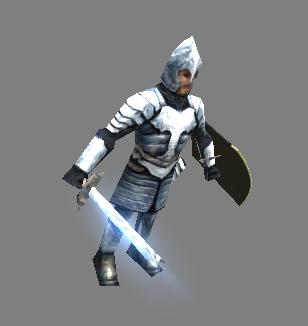 1 - Gather all the needed files into one folder to be able to view the model in the viewer. (They can all be found in various .big files - texture/w3d) - exlnzflar2.dds - gumanatarms.dds - gumaarmsshield.dds - gumaarms_skn.w3d - gumaarms_skl.w3d You can also add the animation files as well, but they are not needed. (I currently have one giant folder that contains all of the models, animations, textures, etc. for each game. It took a while to set up, but it made it very easy to check anything I want or use anything that I need.) And if you are looking for a higher quality gondor soldier skin - just take a closer look at the SDK. 2 - Next we will be looking up values in the w3d file to know what we are going to change. So open up the gumaarms_skn.w3d file using wdump. (The default location for the program is "C:\Program Files\RenegadePublicTools\WDump") (On the last page I'll be adding a guide to navigating the w3d file and wdump) 3 - Within wdump, you'll be opening up the CHUNK_MESH items and look for the chunk named "FORGED_BLADE". Each chunk represents a sub-object and we want to change the forged blades. 4 - Within the FORGED_BLADE Chunk you will be looking for W3D_CHUNK_VERTEX_MATERIAL, and then you will be looking for the W3D_CHUNK_VERTEX_MATERIAL_INFO. Click on that and you will see many of the values that relate to the Vertex Materials within the Renegade materials in RenX. We will be changing the Material.Emissive value of (23 45 75) 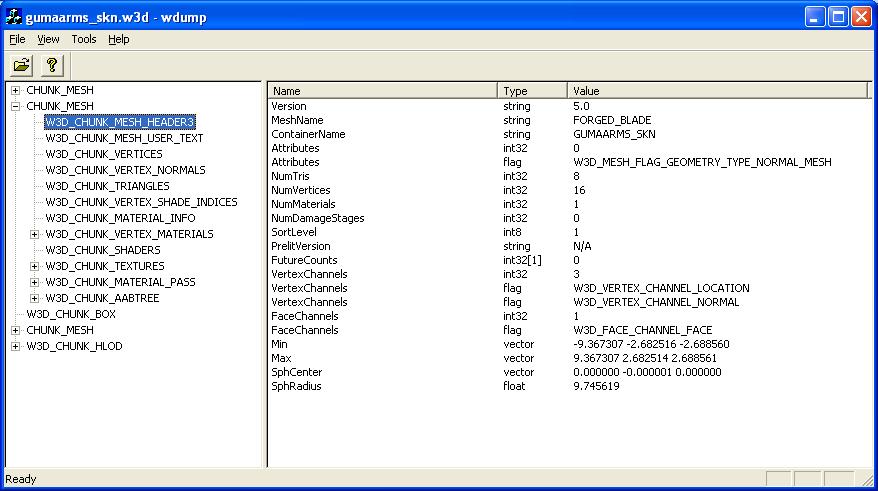 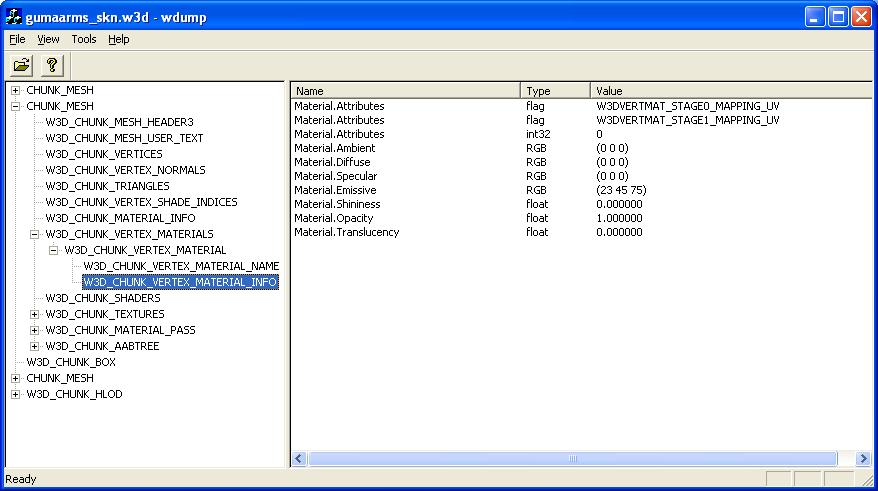 Example of area within RenX: 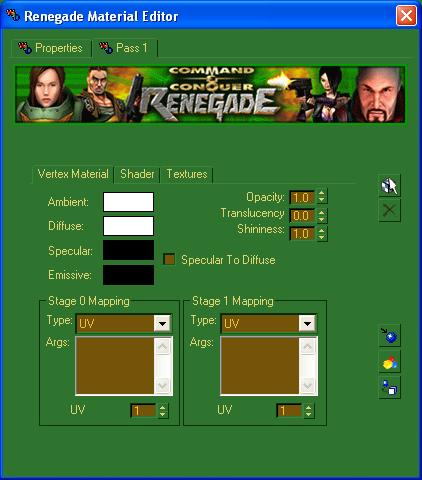 5 - Before we change this value, we will need to know what the value is in hex. Easiest way to change values for me has always been using the calculator for windows. Open up the calculator and change the view to Scientific. Enter the value you want converted, then click Hex. For our values they are changed to 17 2D 4B. 6 - Now time to hex edit. Open up the gumaarms_skn.w3d in the hex editor. First we want to search for the sub-object, so look for "FORGED_BLADE" all caps. This will take you to the name in the header of the chunk. From there, look for the hex sting of the emissive property (17 2D 4B). Now we will change this to whatever you want. Just change the 3 values and nothing else. Then Save.  That's all! Samples of values: (30 30 30) - White 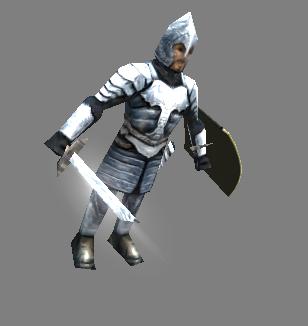 (30 30 00) - gold 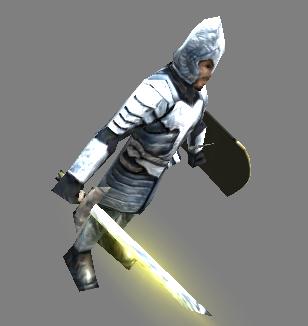 (10 40 10) - green 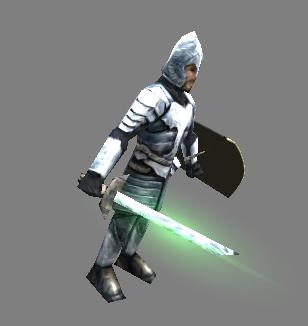 I'll be adding more pages in due time. Just ask what you'd like to see. CommentsDisplay order: Newest first THEVALAR - Monday March 9, 2015 - 11:20 Nice guide :) Can I ask you a question? could you make another guide how to change gandalf's word of power color? for expamle like this: https://www.youtube.com/watch?v=2lUkt_9ff2E because I tried everything, and I havent got a clue why not working after all. I made a topic already on the forum http://forums.revora.net/topic/85627-word-of-power-designing-question/ but for some reason i got lost for the posters instructions. So my question is could make a step by step guide for this please? I'll appreciate for that. GothmogtheOrc (Team Chamber Member) - Thursday July 9, 2009 - 13:43 Awesome tutorial! Thanks so much! That saved a ton of time. Lurtzy - Tuesday June 10, 2008 - 12:35 Thanks! |
 |
|||||||||||||||||||

"One site to rule them all, one site to find them, © All Rights Reserved Eric Edwards ©2013. |
|||||||||||||||||||||


 Previous