

This mod tends to follow the lore of books and films along with bringing the realism in the gameplay |
|
This mod tends to follow the lore of books and films along with bringing the realism in the gameplay |
| Welcome Guest ( Log In / Register ) |
|
 |
Quick Lists Top RatedTutorials Living World Map G Ultimate beginner' Arrow scaling bug Raising Heroes max Proper Fire Arrow Creating an asset. Simple Structure B Making a simple Ma Quick and easy sno Making patrols nea Mods The Dwarf Holds The Peloponnesian RJ - RotWK The Elven Alliance Helm's Deep Last H The Elven Alliance Special Extended E Kings of the West RC Mod The Wars of Arda Downloads BFME1 1.06 Widescr Enhanced W3D Impor Fudge's Map Pack LotR/BfME HD Logos Osgiliath Shellmap Crystals Of Ancien 2v1 Wold The forests of Dru Converted BFME2 an ROTWK animations f |
|||||||||||||||||||||||||
 |
Register and log in to move these advertisements down Creating Basic Normal Maps
At this point it's relatively easy to put the bump map into the Bump slot in 3ds Max to see how this looks. It won't represent the normal map result that well, but it's a quick way to check how things are going. 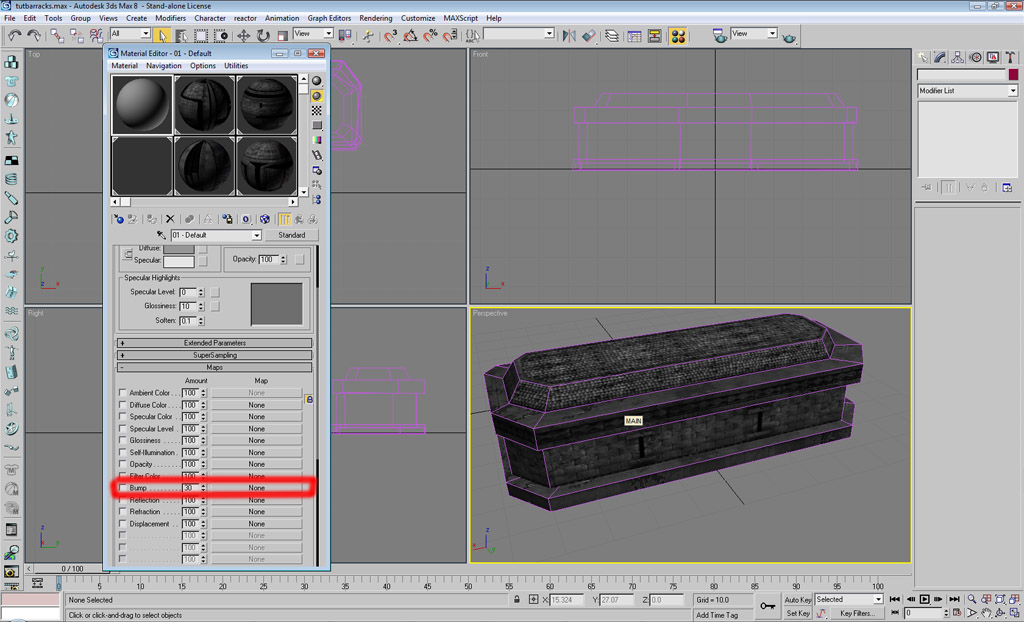 Once you're satisfied, save a copy of your texture, and merge everything into one layer. We do this because the Normal Map Filter only operates on 1 layer at a time with any effectiveness. Also this way you have all your other layers in your bump map backed up in case you make a mistake. Now to to Filters -> NVIDIA Tools -> Normal Map Filter. This box looks complex... Allow me to explain what does what, and what settings you should use. 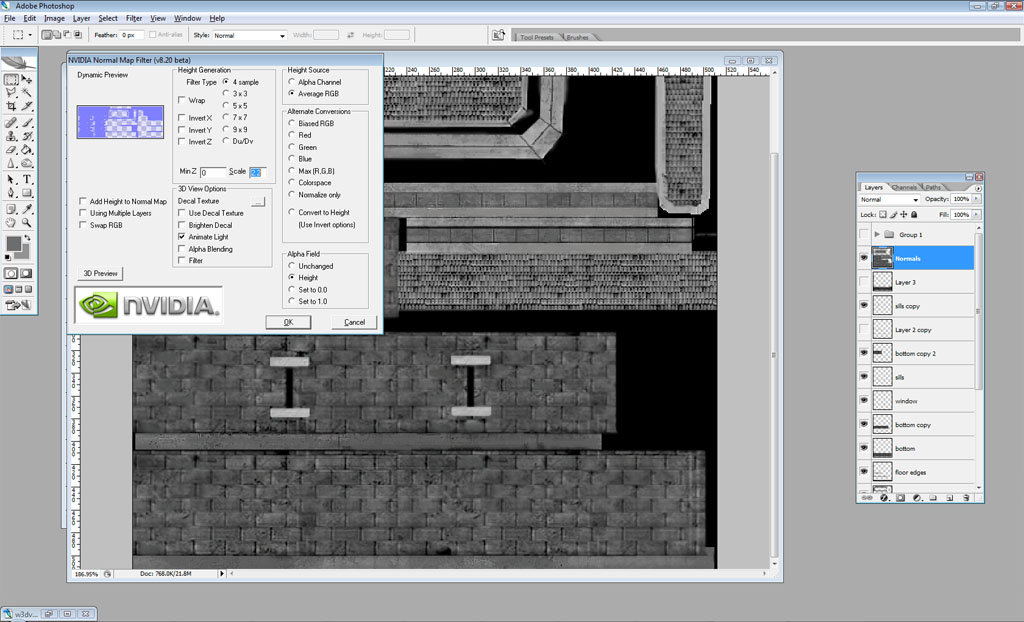
Once your settings are set up, click Ok... 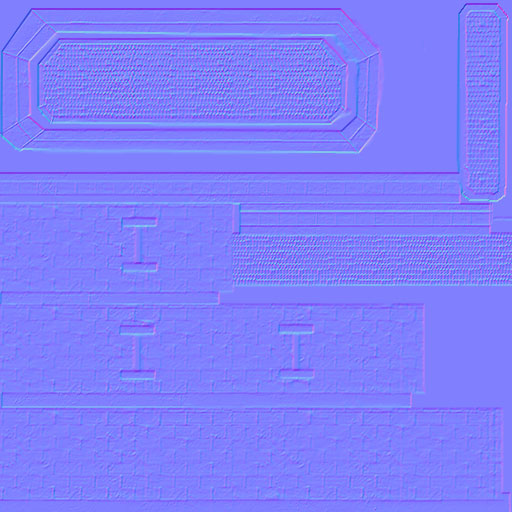 Oh, it's so beautiful... to put it on your model, head on over to my other tutorial, Applying Normal Maps Hope this was explanatory. There are other ways to make normals, but for models of BFME detail level, this is the simplest and the others would be overkill. The method shown here is similar for any kind of object - just assign a hierarchy of heights and draw a bump map based on it. Thanks for reading. Links / Downloads
CommentsDisplay order: Newest first Adamin - Friday March 12, 2010 - 8:05 Thank you very much. Creating a normal map worked quite well with this instruction. But I have one question: Shouldn't the "Invert Y" option in the normal map filter be ticked? Otherwise the lighter (therefore higher) parts of the bump map seem to go down on the normal map. Or is this irrelevant? Sulherokhh (Team Chamber Member) - Wednesday April 29, 2009 - 1:45 Yippee! :P Never knew what a bumpmap was until now! :D |
 |
|||||||||||||||||||||||||

"One site to rule them all, one site to find them, © All Rights Reserved Eric Edwards ©2013. |
|||||||||||||||||||||||||||


 Previous