

This mod for bfme 1 Mod based on Elvestar 5.5 |
| Welcome Guest ( Log In / Register ) |
|
 |
Quick Lists Top RatedTutorials Living World Map G� Ultimate beginner'� Arrow scaling bug� Raising Heroes max� Proper Fire Arrow� Creating an asset.� Simple Structure B� Making a simple Ma� Quick and easy sno� Making patrols nea� Mods The Dwarf Holds The Peloponnesian� RJ - RotWK The Elven Alliance� Helm's Deep Last H� The Elven Alliance Special Extended E� Kings of the West� RC Mod The Wars of Arda Downloads BFME1 1.06 Widescr� Enhanced W3D Impor� Fudge's Map Pack LotR/BfME HD Logos Osgiliath Shellmap Crystals Of Ancien� 2v1 Wold The forests of Dru� Converted BFME2 an� ROTWK animations f� |
|||||||||||||||||||||||
 |
Register and log in to move these advertisements down Living World Map Graphics Deconstruction
Water Graphically, water in the LWM is likely the most difficult to replicate. It has several distinct objects; a sea surface, a wave object, a shore wave object, and the seafloor (part of the land). In the original LWM, these subobjects are as follows
I'll now discuss each object in detail. Note that as I mentioned before, you won't be able to exactly duplicate EA's water using the 3ds Max exporter, but you should be able to get damn close. Ocean Surface The ocean surface provides an animated normal mapped surface to make the water look bumpy, and a simulated world reflection to make it look a bit more like water. The stock LWM uses it over the ocean, of course, but also over large water bodies (Sea of Rhun, Sea of Nurn)  Modeling-wise, it takes the shape of a plane that matches the shape of the ocean. The surface object in the original LWM isn't too detailed; it doesn't have to be as the coastline of Middle Earth is not very complex. Texture-wise, you should examine the subobject in WDump yourself (tutorial by yours truly coming soon!), to make sure you understand the settings. Essentially, the material has 2 components, stage 0 and stage 1. Stage 0 is the normal-mapped one, which has a slow scroll incorporated. This means that it will move slowly in the +U direction on the texture - you should map your ocean object to take advantage of this. With proper mapping you should be able to make all water scroll towards the shore. The following screenshot shows you what material settings I ended up using for my LWM reconstruction's water: 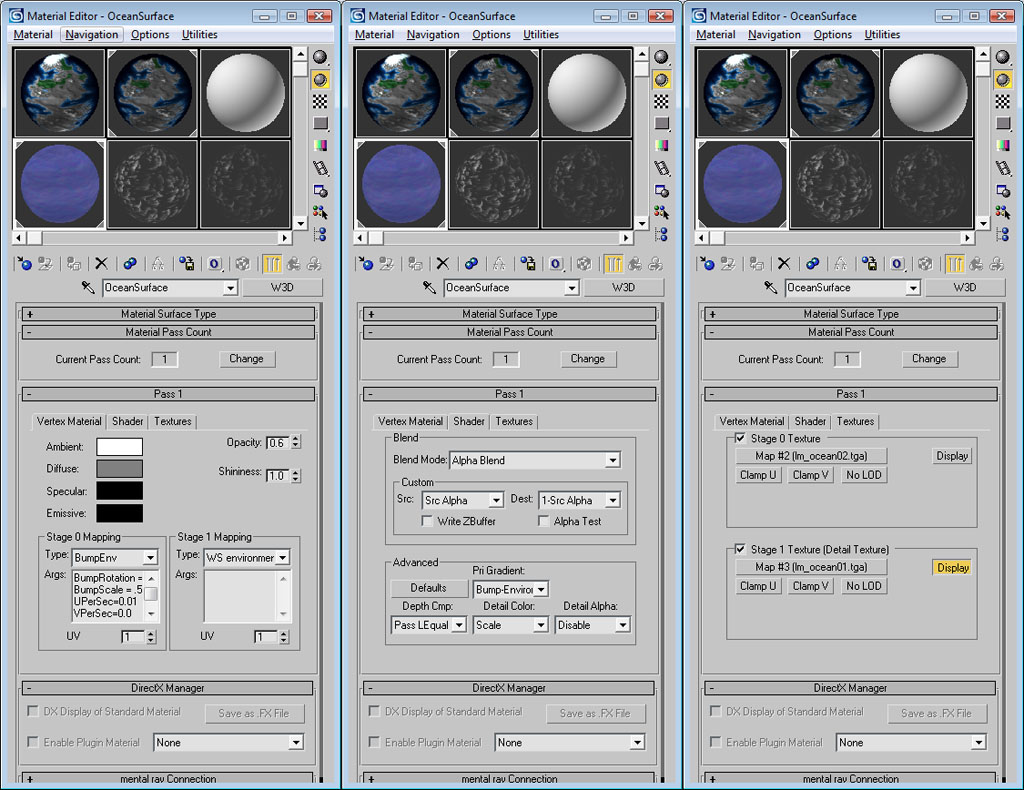 The box you can't quite see (stage 0 mapping) contains:
This produces this effect ingame.  Experiment with this as much as you want. Ocean Waves Ocean waves are added on top of the Ocean Surface to give certain areas of the LWM a wave-ridden look. EA uses them over the entire ocean area as well as over large lakes.  Model-wise, they are large, non-shaped planes (all shaping is done via vertex painting). Texture-wise, they use two stages. Both are linearly offest, so the waves scroll in the +U texture direction. Proper mapping is essential to ensure that the waves scroll in the correct direction (ideally, towards the shore). The W3D shader settings are difficult to get right for this one, despite the shader being a simple Additive. The next screenshot shows you my settings: 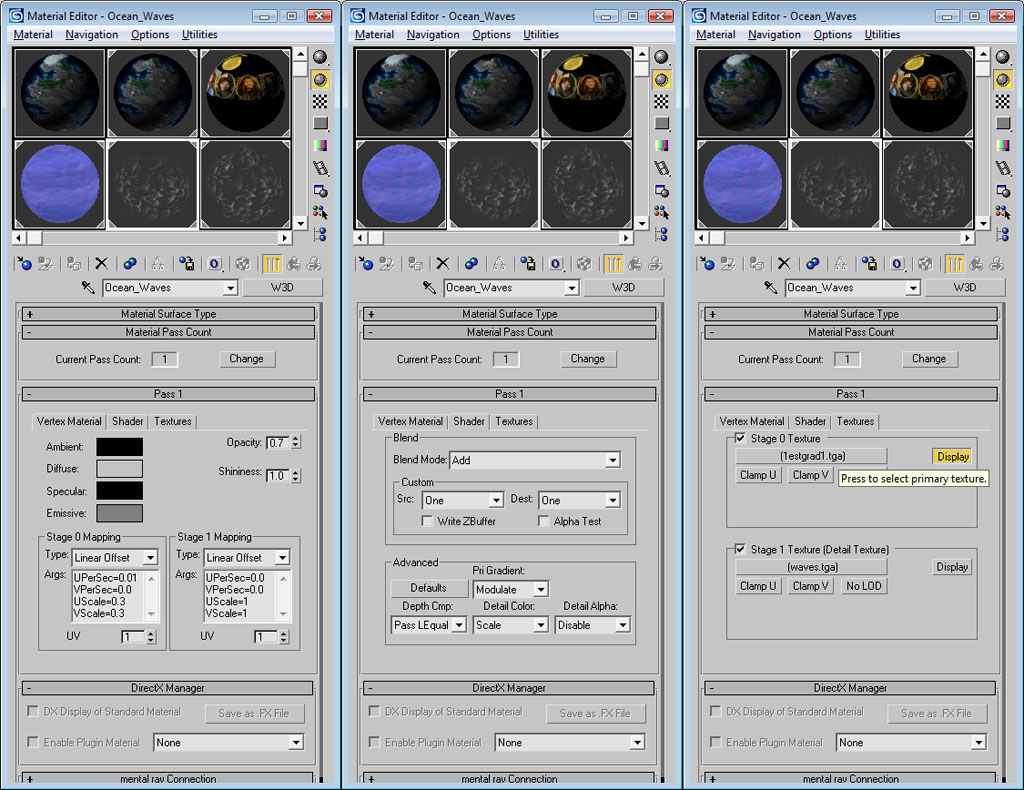 Note that the Stage 0 texture is a custom file I am using. It's simply a radial gradient (dark to white) that controls thet ransparency of the waves, so that a single plane with this material applied appears ingame as a round, edge faded object with scrolling waves. Again, as this is not a direct replica of the EA waves, you will likely have to play with it somewhat to get the effect you want. Coast The coast gives you shoreline waves to look at, improving blending between the Ocean Surface and the land, which is otherwise quite abrupt. These are constant along the entire coastline. 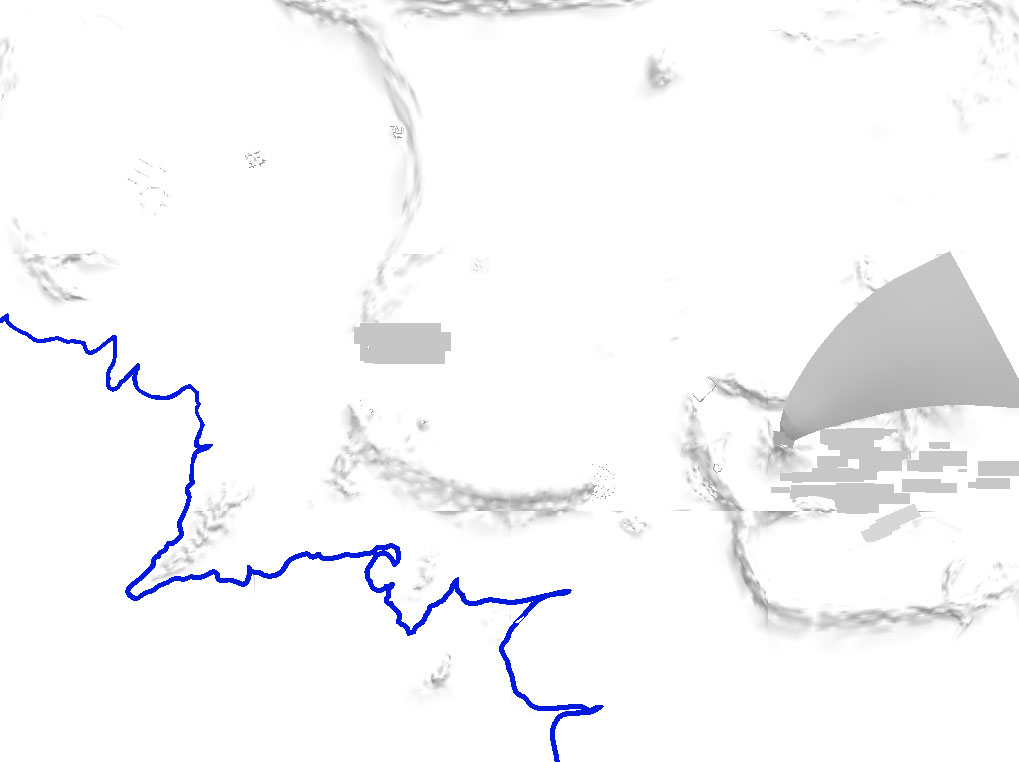 These are the most complex water objects to model, so I'll go into a bit more detail with how to build them. The easiest way to make one is with a spline. Go to the Spline panel and select Line as shown. 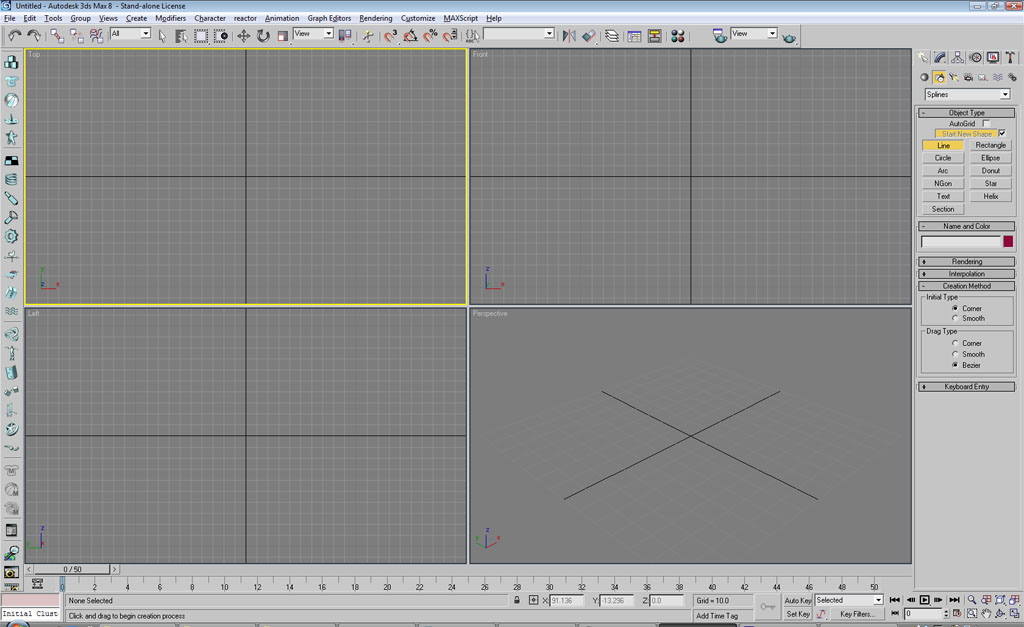 Now use this tool to trace the coastline. Clicking creates an anchor point, clicking and dragging allows you to deform the spline. Right click to end the spline. Now, right click on it and select Convert to -> Editable Spline. 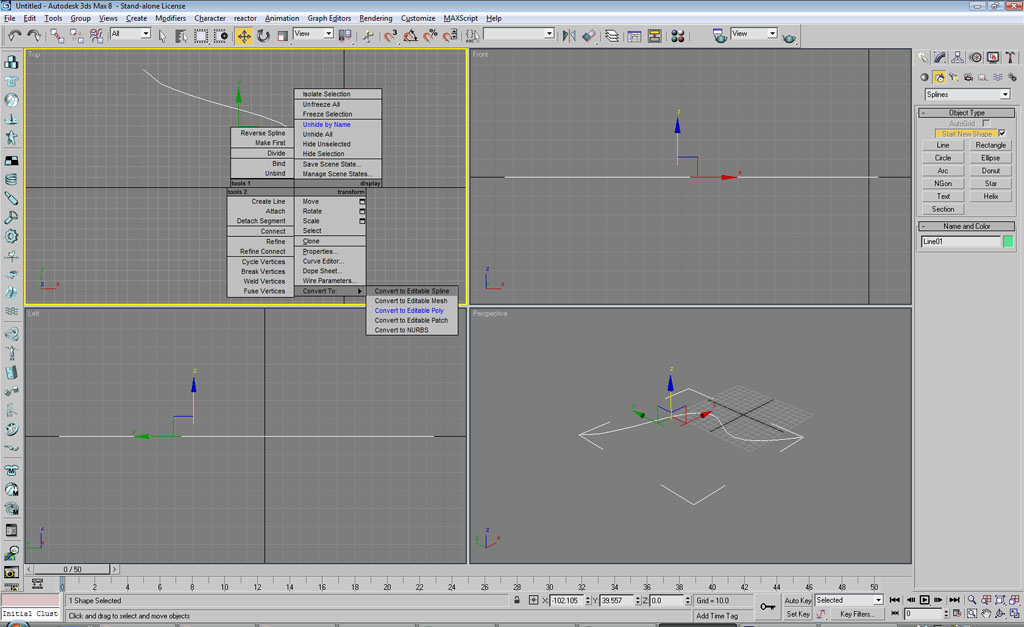 This panel on the right lets you use the standard max tools to edit the spline if need be. You can attach other splines you used for the coastline if need be, or add anchor points with the Refine tool. 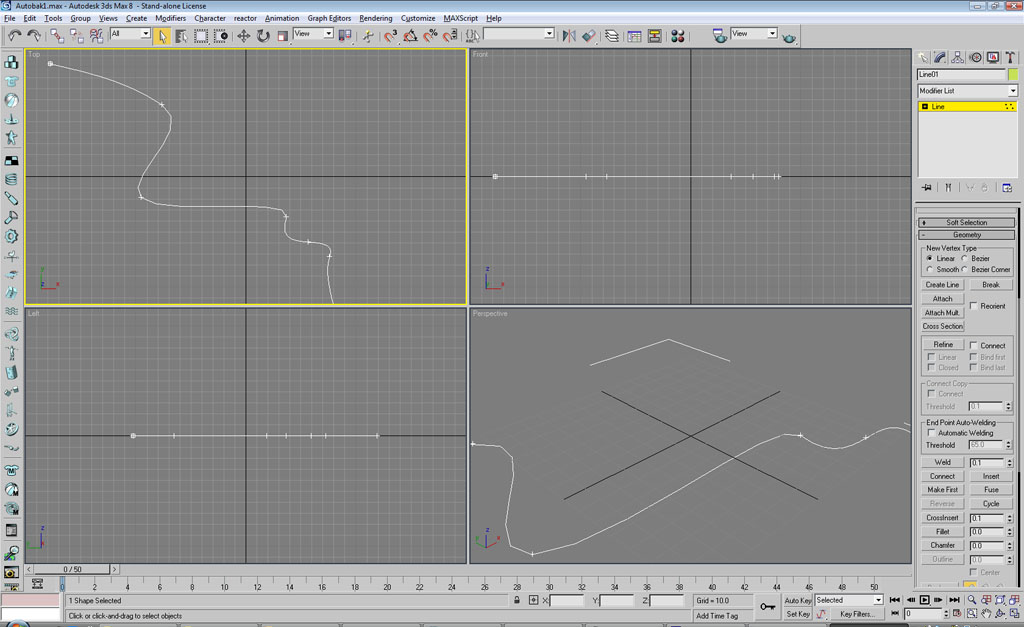 Once you're done, scroll up to Rendering and open the panel. Tick Enable In Viewport and Rectangular. Adjust the width to something you think right for your waves. 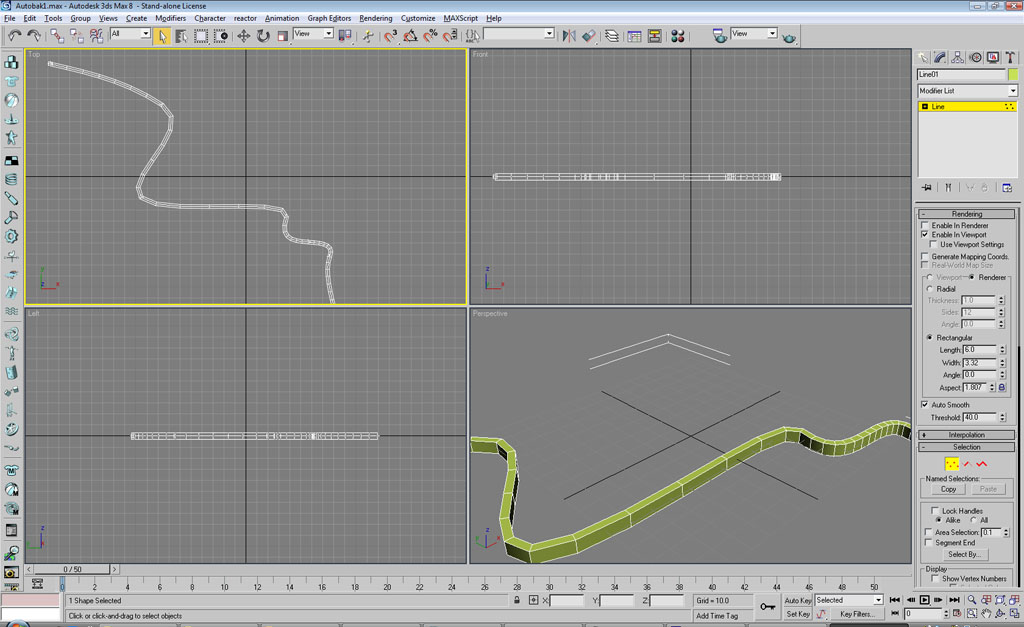 Now, scroll down to Interpolation and open the panel. Disable Adaptive or Optimize and increase the Steps until the coastline looks smooth enough for your liking. Don't make it too smooth or it'll be too high poly for the game.  Once you're sure you're done, add an Edit Poly modifier. Then, using vertex selection, select the vertices on the bottom of the spline object 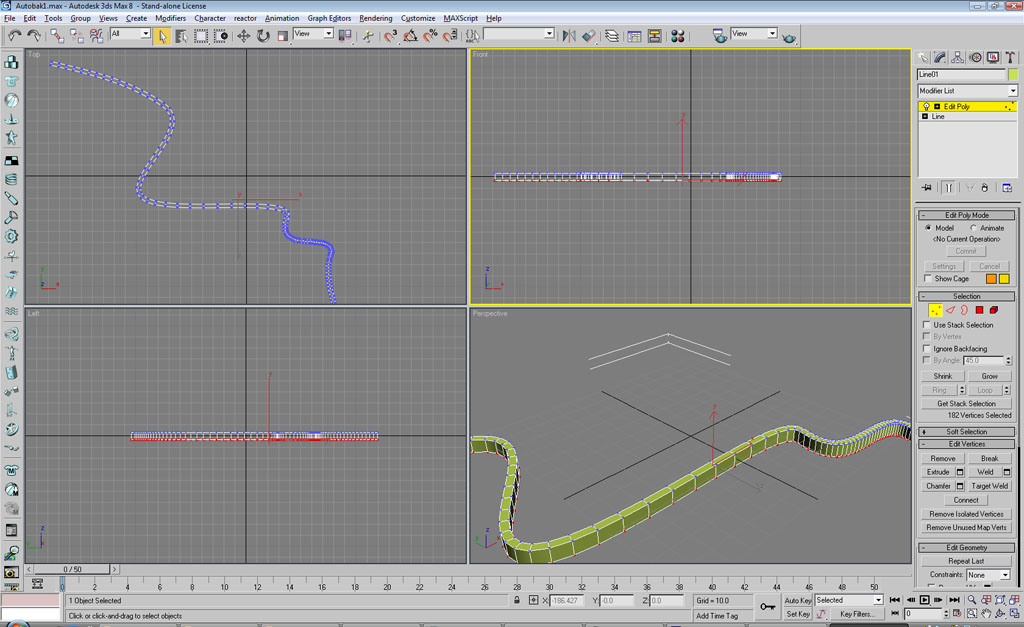 Delete them. You now have a coast model 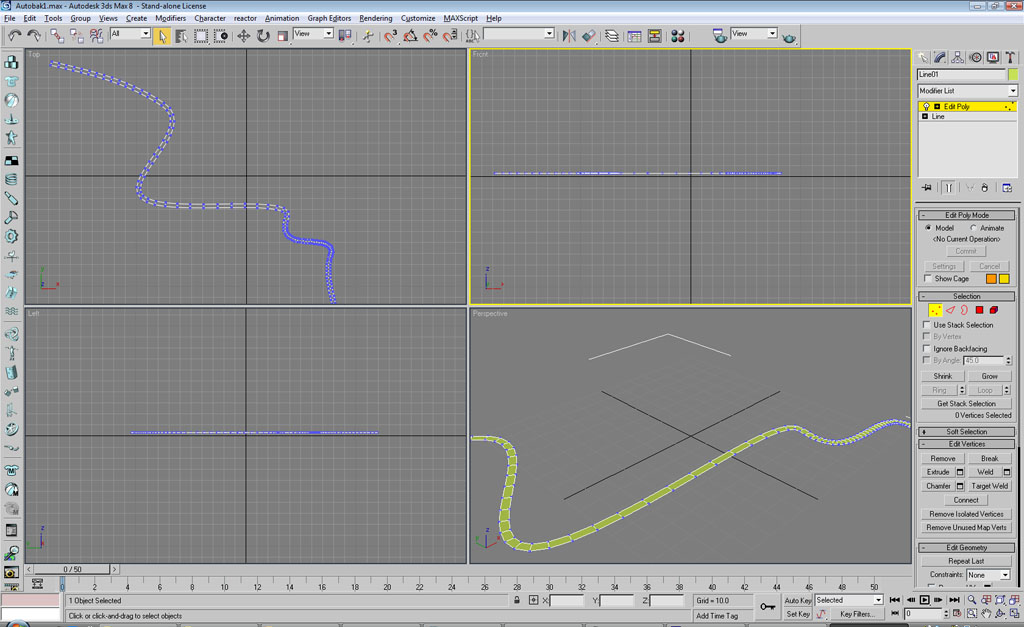 Now to map it easily is difficult. Luckily you can cheat with a Face map, in the UVW Mapping modifier. This will require some cleanup, but it will get all the faces of the coastline aligned in the same direction (to make the waves scroll inland). 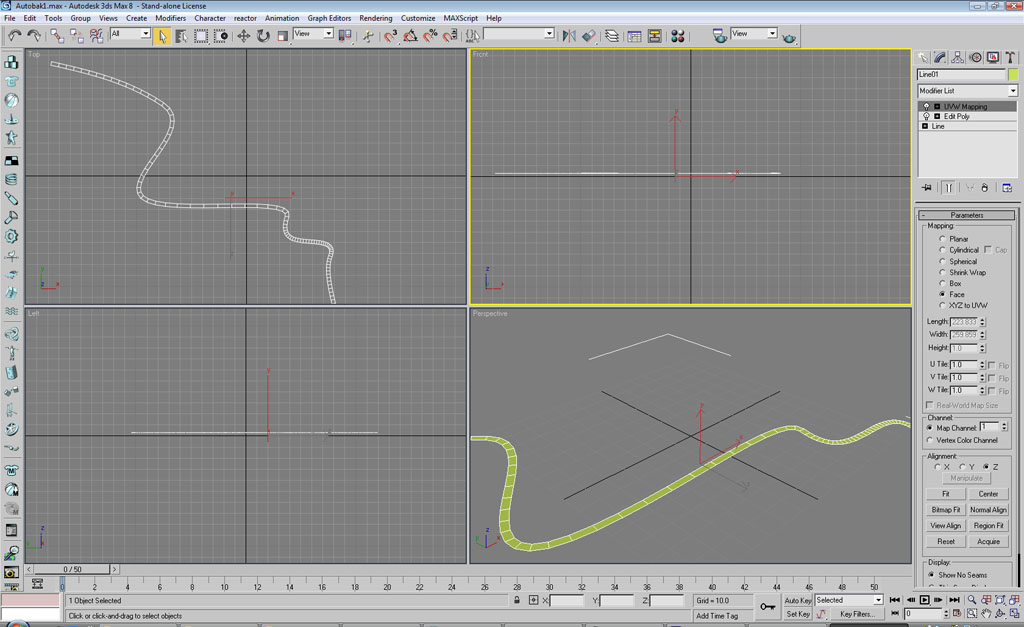 That concludes my quick "how to use splines" tutorial. Note that you will need to slice more faces in there to make it all look good, but it's the fastest way I could think of. Well actually I can think of one more, but it's a far sight harder to explain. Now texture-wise this material is pretty simple. 2 Stages, each linear offset. This makes the waves scroll inland. As usual, I recommend you take a look at the WDump output, but I have included my settings. Vertex painting is essential to make these look good. 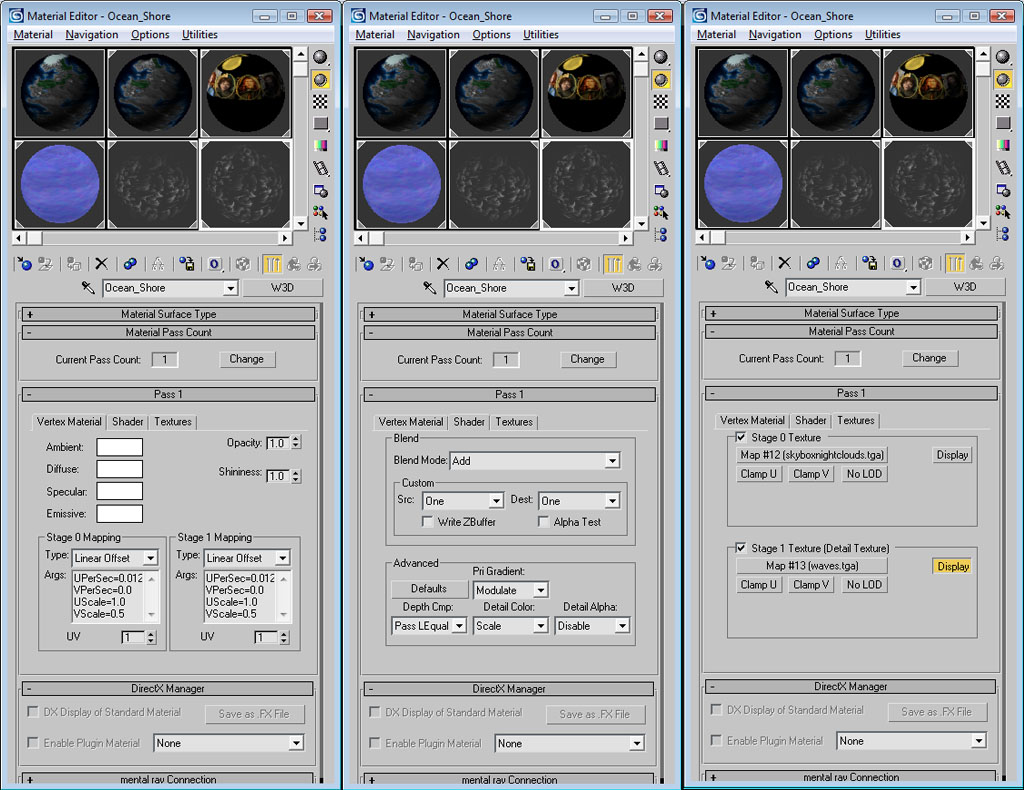 Water Code No coding is required to implement any of the water components, just make sure it is unhidden when exporting the model. If you're making a new LWM, this part will probably take the most tweaking of any section. CommentsDisplay order: Newest first Sulherokhh (Team Chamber Member) - Tuesday April 28, 2009 - 9:26 Whosoever dared to rate this at '4' now has to explain what is missing for it to be rated '5'. Námo - Tuesday April 28, 2009 - 1:59 Excellent! and MOST welcome - lots of thanks to both of you! |
 |
|||||||||||||||||||||||

"One site to rule them all, one site to find them, © All Rights Reserved Eric Edwards ©2013. |
|||||||||||||||||||||||||


 Previous