
The final battle between the Alliance of Men and Elves and Mordor. |
| Welcome Guest ( Log In / Register ) |
|
 |
Quick Lists Top RatedTutorials Living World Map G Ultimate beginner' Arrow scaling bug Raising Heroes max Proper Fire Arrow Creating an asset. Simple Structure B Making a simple Ma Quick and easy sno Making patrols nea Mods The Dwarf Holds The Peloponnesian RJ - RotWK The Elven Alliance Helm's Deep Last H The Elven Alliance Special Extended E Kings of the West RC Mod The Wars of Arda Downloads BFME1 1.06 Widescr Enhanced W3D Impor Fudge's Map Pack LotR/BfME HD Logos Osgiliath Shellmap Crystals Of Ancien 2v1 Wold The forests of Dru Converted BFME2 an ROTWK animations f |
|||||||||||||||||||
 |
Register and log in to move these advertisements down Texturing the Golasgil Household Knights
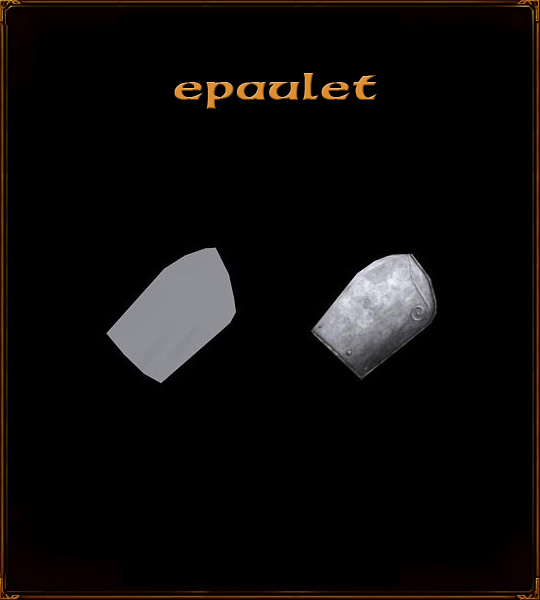 This shoulder plate is... nothing special, just a piece of metal to guard the junction between arm and body. The shoulder's edge is drawn in with the pen tool on another layer 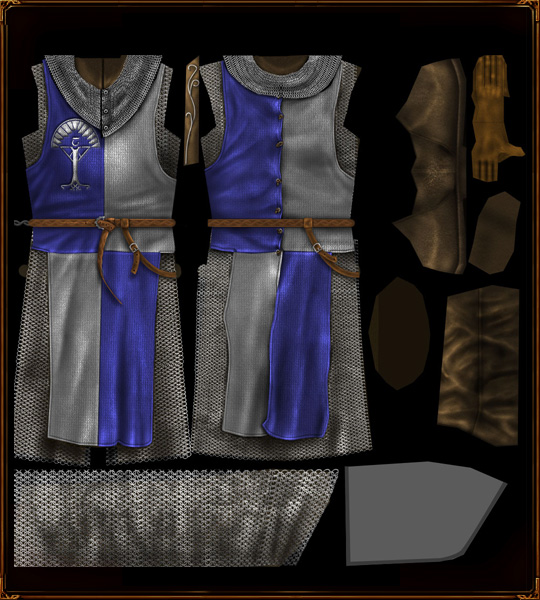 Dodge tool rounds it off, burn tool helps.  More shadows, this time on the main epaulet layer  Using a large highlight brush, the general highlights are established, where what will be bright. 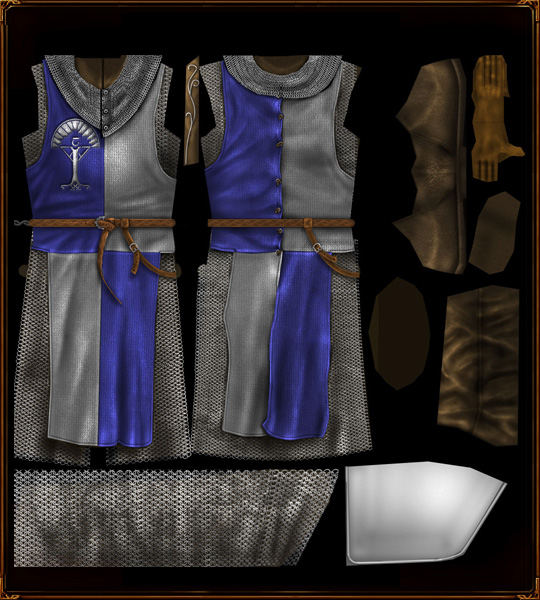 The general shadow pattern is also applied.  Using a random spattery brush, I start adding some texture to the centre area.  The same brush on burn accentuates the shadowed area. 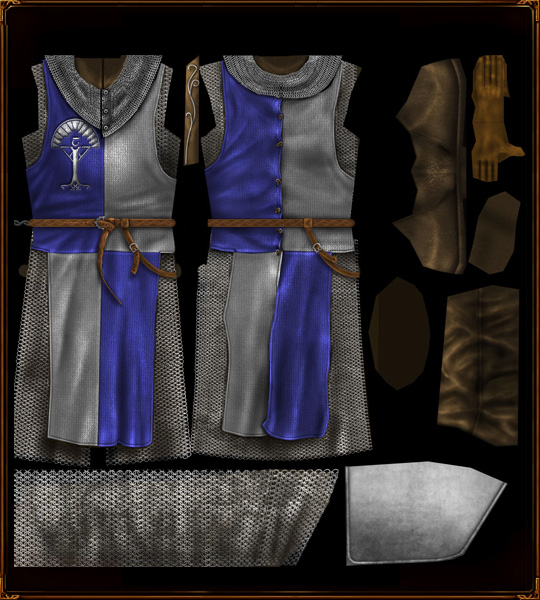 Another couple of brushes later.  The pattern also extends onto the edge of the plate.  Adding some details - a new spiral drawn with the pen tool.  Layer mode set on overlay, with a bevel layer effect. 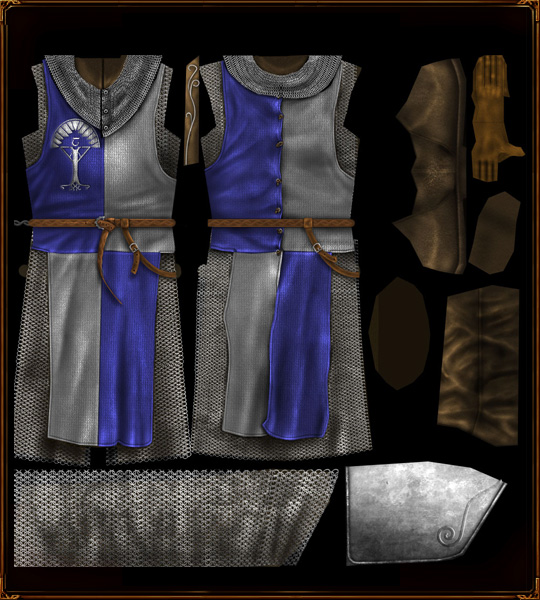 To create some bolts, more beveled circles are added.  A small hard shadow resulting from the bolt is placed around it.  To hold the plate on, a strap goes around the upper arm area - easily drawn in. 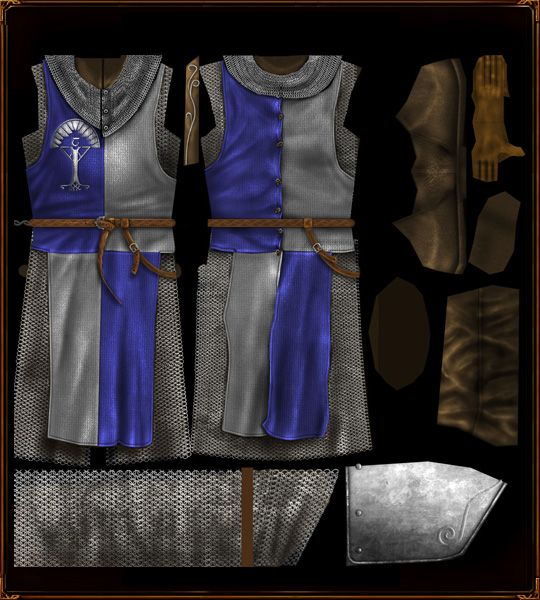 Shadow of the strap.  Establishing how the strap and associated buckle will work with basic shadows.  Finally, some highlights that try to match what we did with the belt, for continuity. 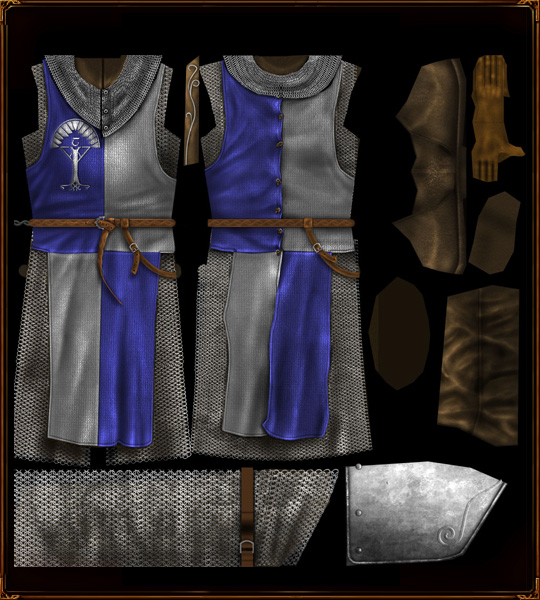 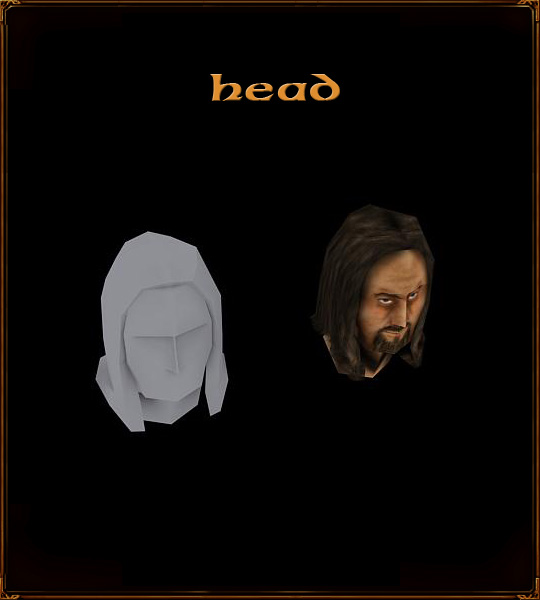 I really shouldn't be teaching people to texture faces. I suck at it. However, I'll include this section for continuity's sake. Burn brush on midtones - this is used to locate the main areas of the face, namely the corners of the eyes, the mouth, the nose. A basic eye placeholder is also in. 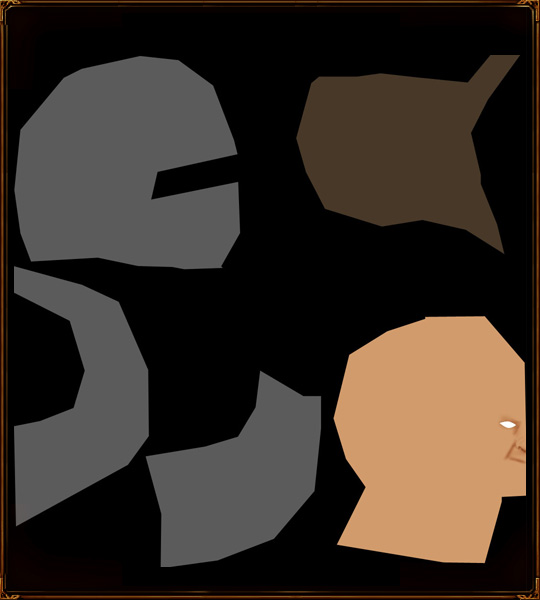 Highlights on midtones establish the raised portions.  Shadows on the eye. 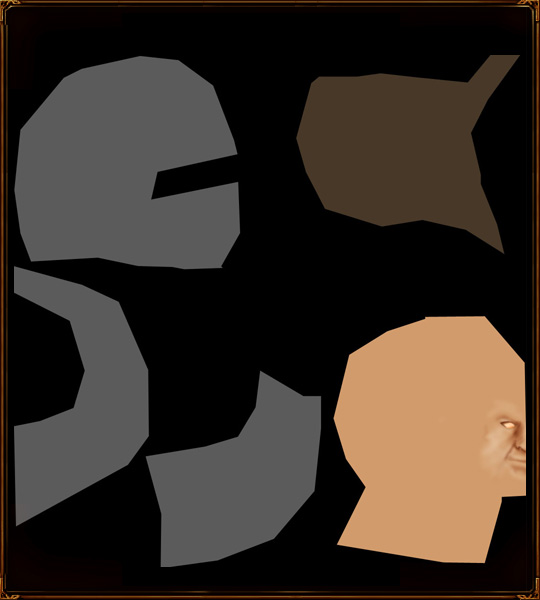 The start of a beard, lovingly drawn with a tiny brush. 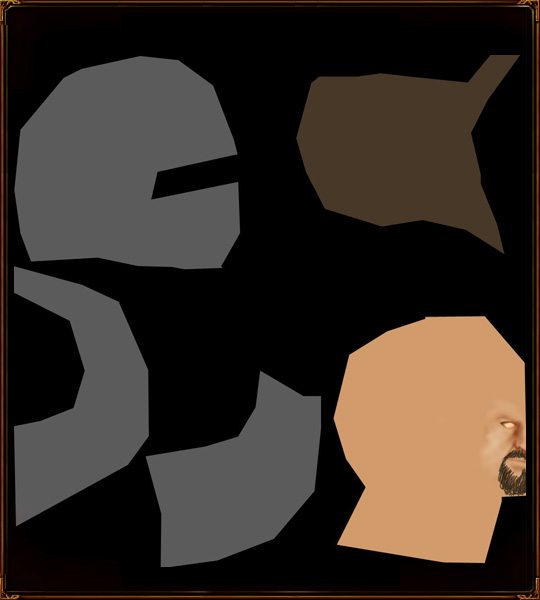 Some refinements to the eye, adding the iris and pupil. This is easy, just a splotch of blue and a splotch of black.  Some further highlights and refinements. 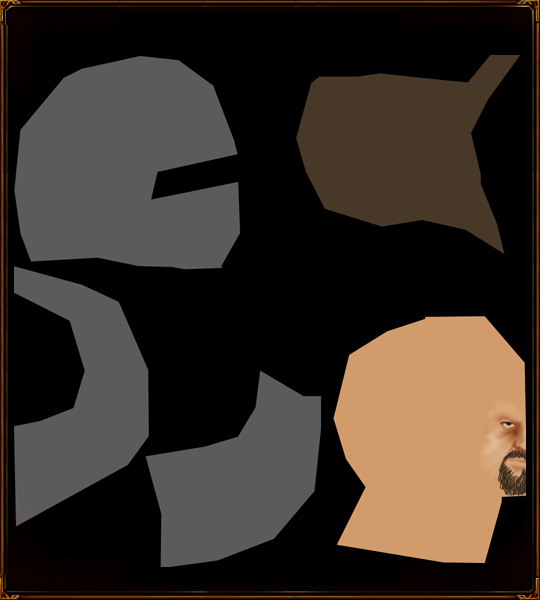 Some more burning, and finishing the beard with some other colours of hair strands. 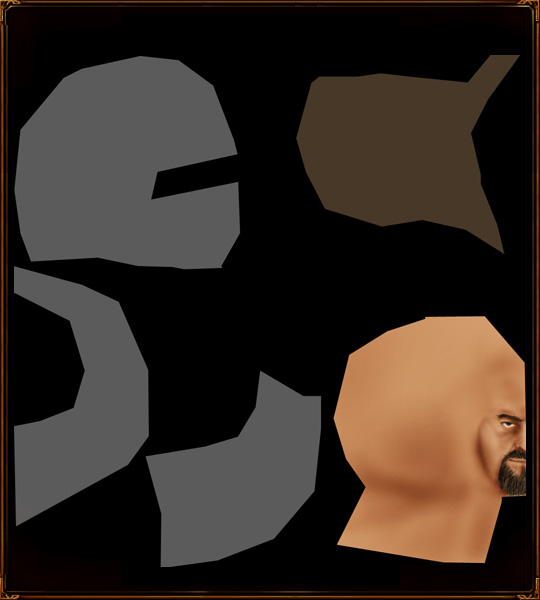 The hair starts with some guides to help me understand where the strands will go. 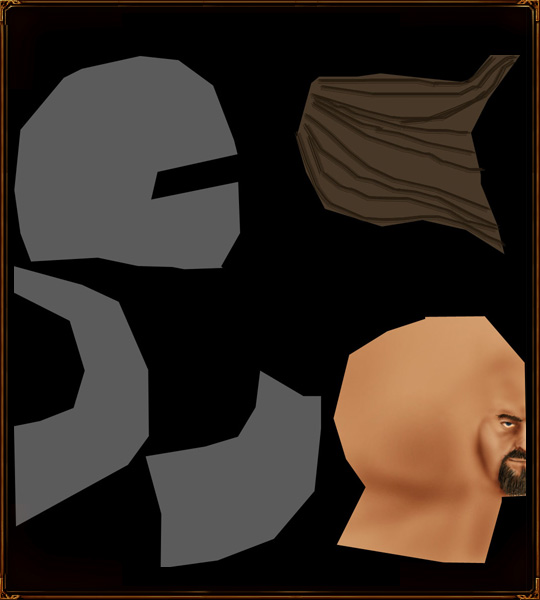 Then, with a rake-like brush, I lay down the dark hair strands. 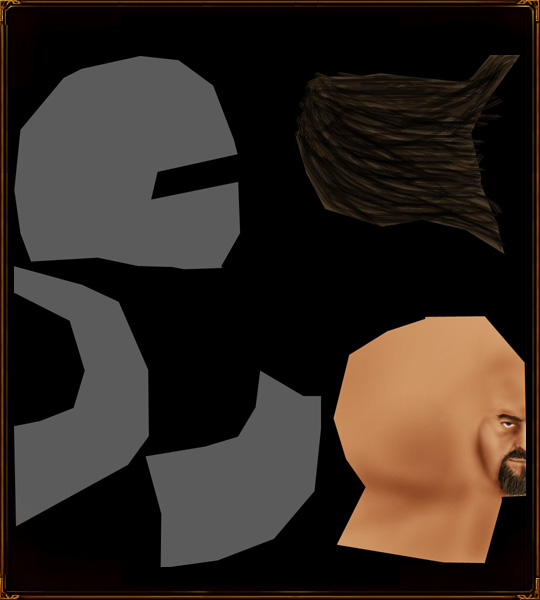 Then, corresponding lighter strands. The brush is on 50% opacity, to add more randomness. 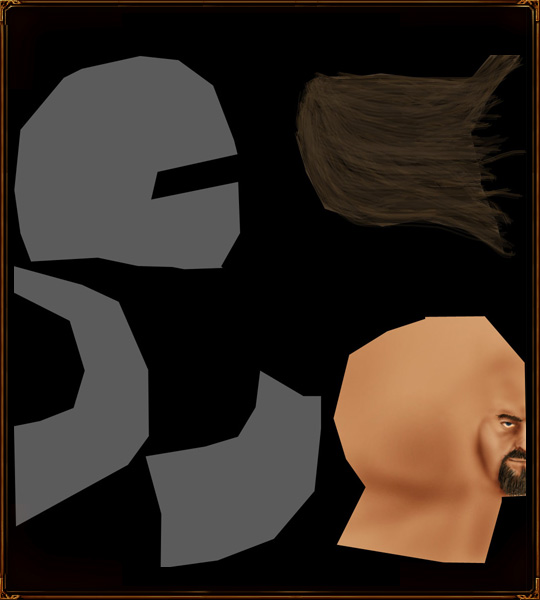 Still using the rake brush, but this time with dodge. 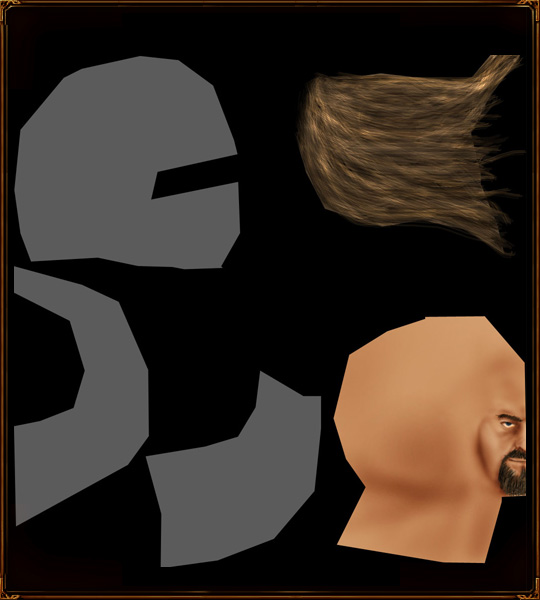 And again with burn! Also I've added the shadow of the hair to the face 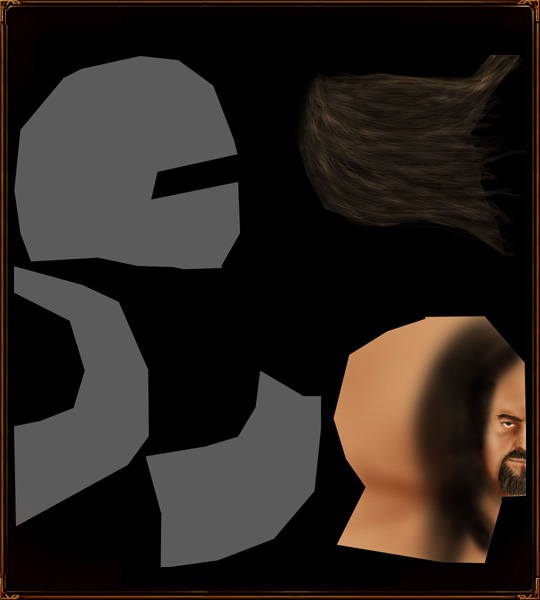 Final tweaks to the face's shadows. 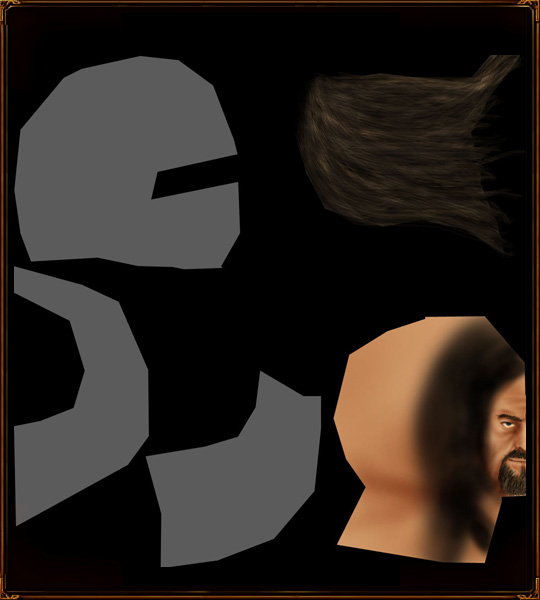 A grimy brush is used to dirty up the face layer a bit. 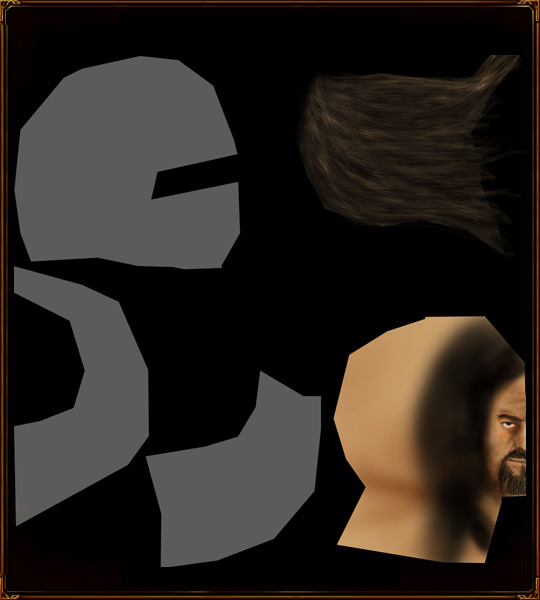 CommentsDisplay order: Newest first | Page: 1, 2, 3 {IP}Sauron - Thursday March 26, 2009 - 12:18 You make it look so easy :P Puppeteer - Wednesday July 2, 2008 - 10:27 I wish I understood how the pen tool works, those patterns look great but I'm finding hard to replicate Persus - Tuesday April 22, 2008 - 3:52 Can you send me a link to the splatter-brushes which you use? LotrCrushah - Saturday March 8, 2008 - 23:57 this is the best tutorial on skinning and texturing ive ever read ={D Fingulfin - Wednesday November 21, 2007 - 23:14 =O Bart (Administrator) - Wednesday September 5, 2007 - 3:09 2 hours is nothing. skinning (and other artforms) take patience Guess Who - Tuesday September 4, 2007 - 23:22 whoa 2 hours well i found out how to use the elipse tool thanx to matias. m@tt (Team Chamber Member) - Tuesday September 4, 2007 - 10:54 Not when Nertea spends at least 2 hours on a skin Guess Who - Tuesday September 4, 2007 - 2:57 make a video tutorial that would be so easy to follow ;) Juissi - Sunday September 2, 2007 - 8:52 I have Photoshop 7 and even that has it :P |
 |
|||||||||||||||||||

"One site to rule them all, one site to find them, © All Rights Reserved Eric Edwards ©2013. |
|||||||||||||||||||||


 Previous