
Play as BFME 1 gameplay in BFME2 |
| Welcome Guest ( Log In / Register ) |
|
 |
Quick Lists Top RatedTutorials Living World Map G Ultimate beginner' Arrow scaling bug Raising Heroes max Proper Fire Arrow Creating an asset. Simple Structure B Making a simple Ma Quick and easy sno Making patrols nea Mods The Dwarf Holds The Peloponnesian RJ - RotWK The Elven Alliance Helm's Deep Last H The Elven Alliance Special Extended E Kings of the West RC Mod The Wars of Arda Downloads BFME1 1.06 Widescr Enhanced W3D Impor Fudge's Map Pack LotR/BfME HD Logos Osgiliath Shellmap Crystals Of Ancien 2v1 Wold The forests of Dru Converted BFME2 an ROTWK animations f |
|||||||||||||||||||
 |
Register and log in to move these advertisements down Texturing the Golasgil Household Knights
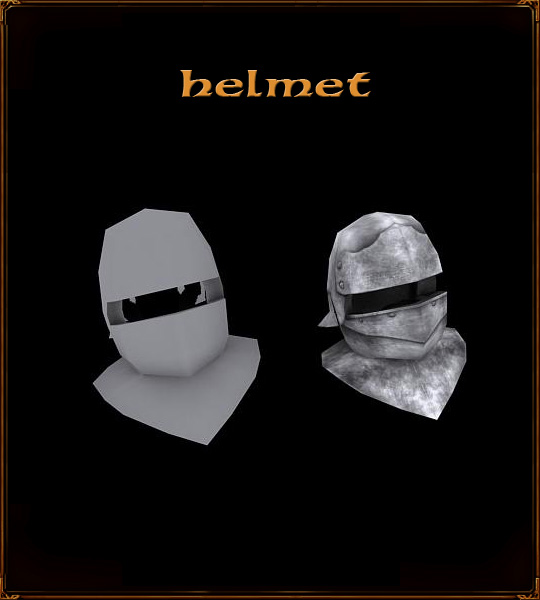 This is not a face! I prefer it to a face. Anyways, this helmet is a sallet, common in the Germanic provinces. It is not articulated and has no visor. Drawing in the overlapping areas of the various helmet plates.  Darker shadows added in the areas with larger gaps.  A general highlight pattern is added, as with the shoulder plate. 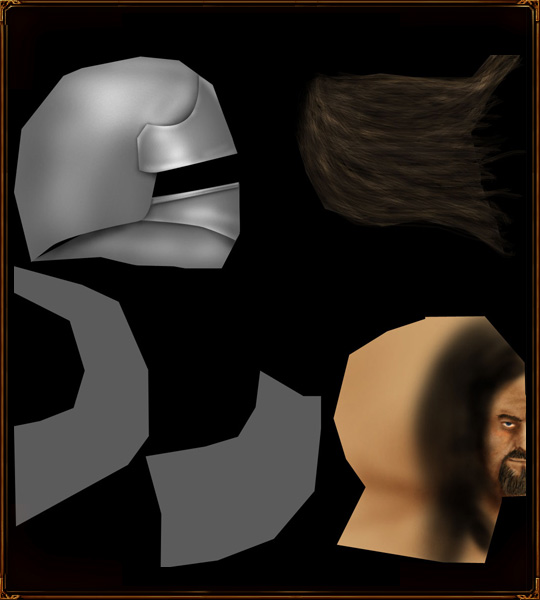 Highlights getting more precise, here along the edges of the plates to round them a bit. A bolt is also added - a simple circle.  The bolt gains some beveling  The blot is duplicated to the appropriate areas.  Some more highlights.  The spatter brush attacks and adds some texture to the helmet. 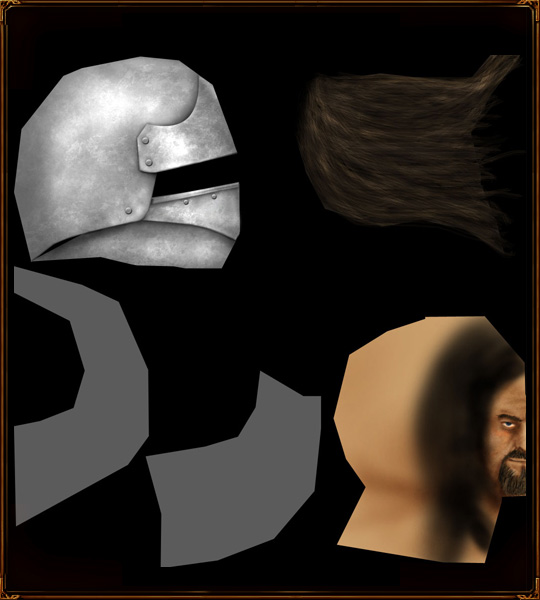 The spatter brush again on burn. 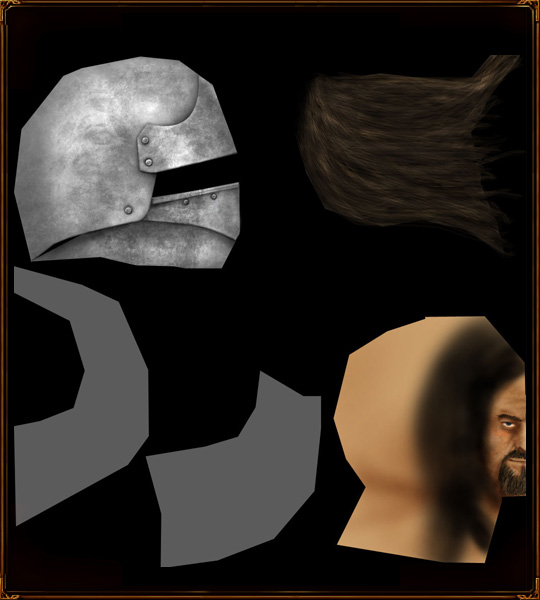 Adding some lines of chop, as I like to call them. Scratches. 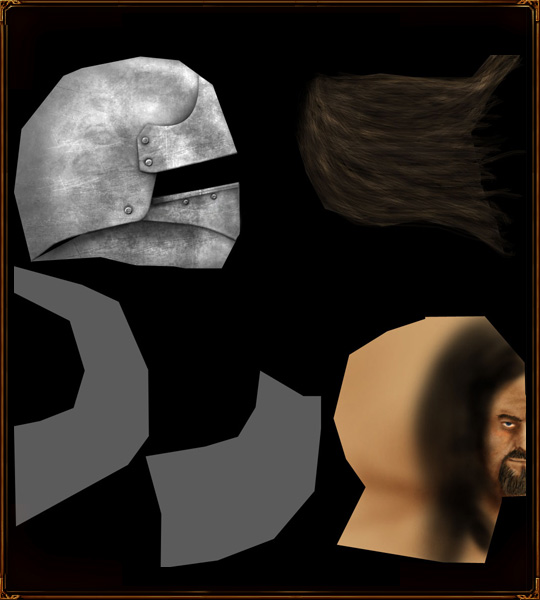 Burning more scratches. Also starting some highlighting on the back of the helmet. 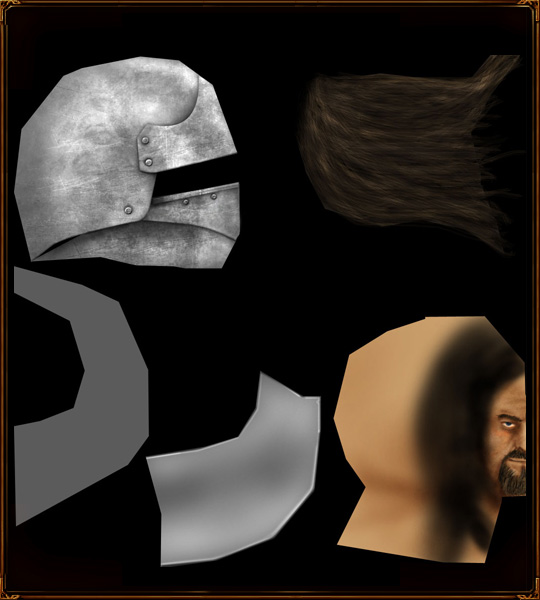 You know the drill by now - spatter dodge. 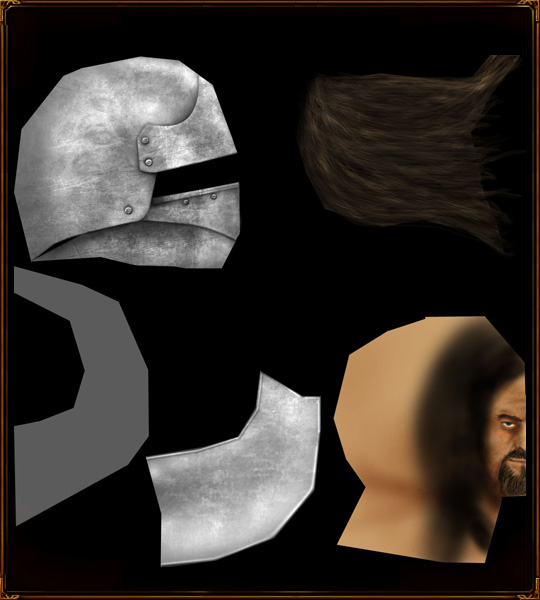 Spatter burn 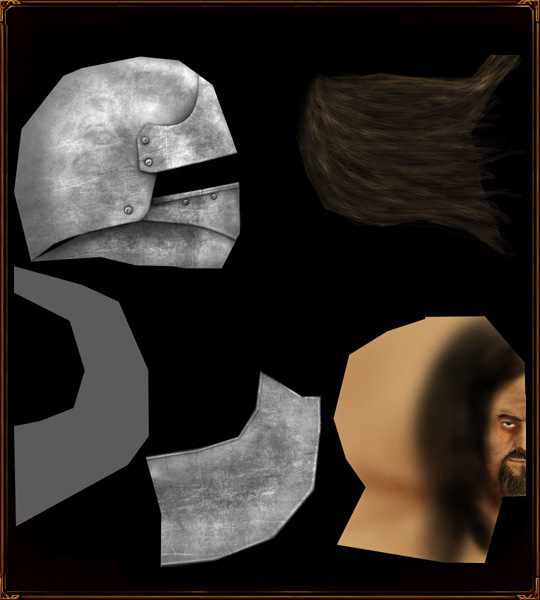 A ring-shaped bolt, drawn, beveled, burned. 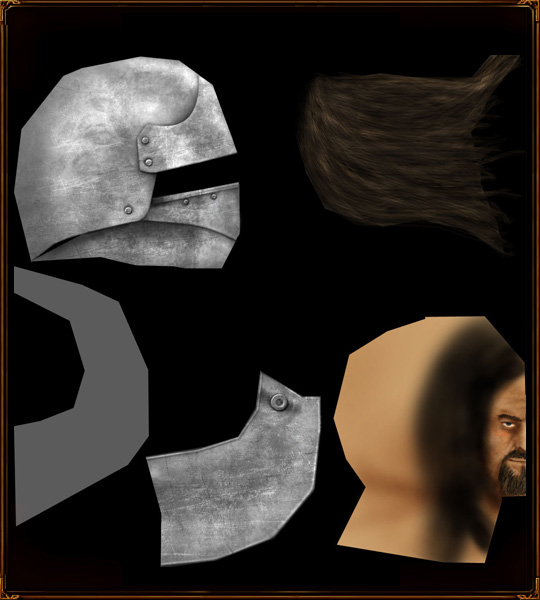 The shadow of the back plate. 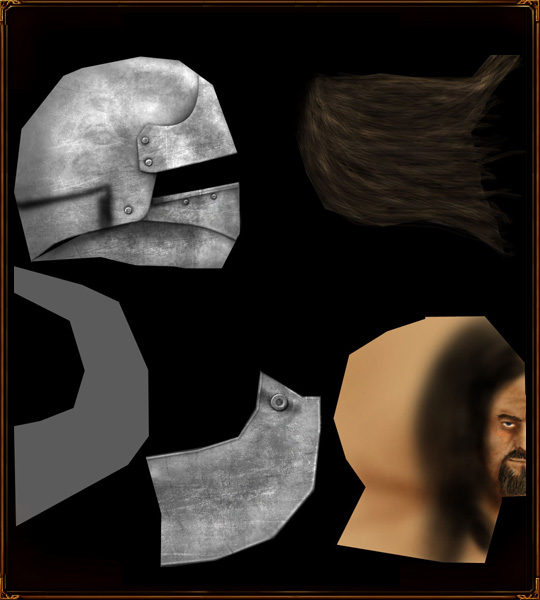 Finally, the neck guard. 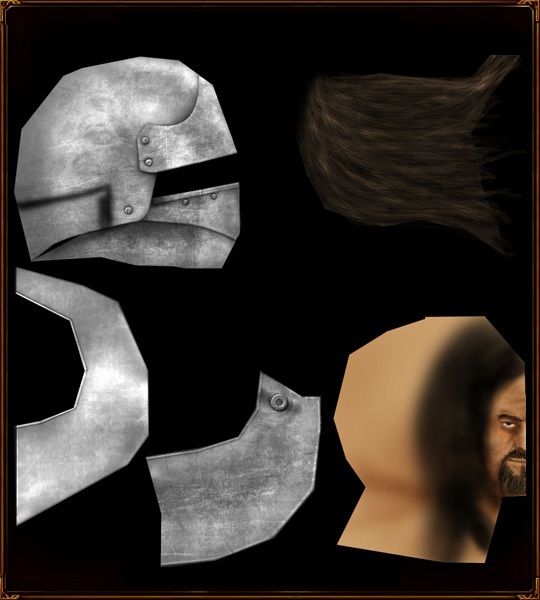 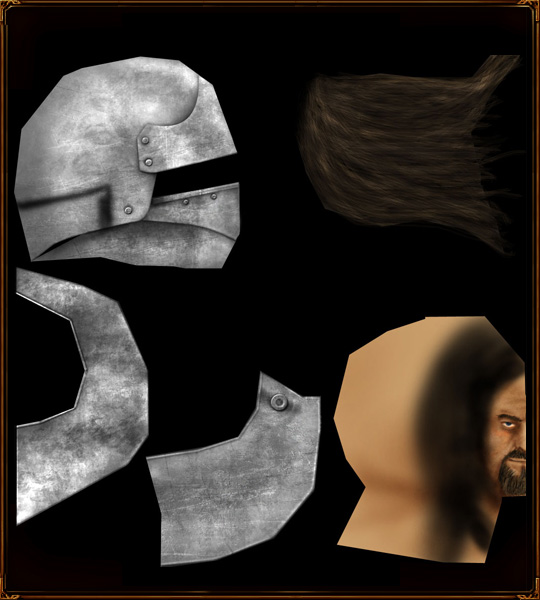 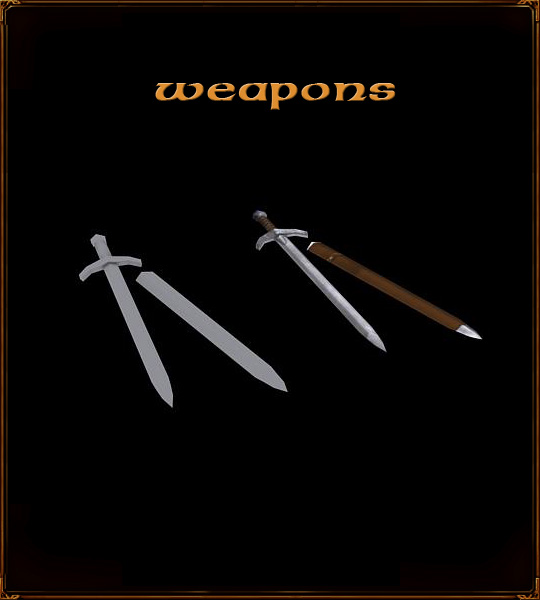 Sword are fun, because they're so easy to map, model and texture at this detail level. Here's the results of mapping, the sword, added to the texture. 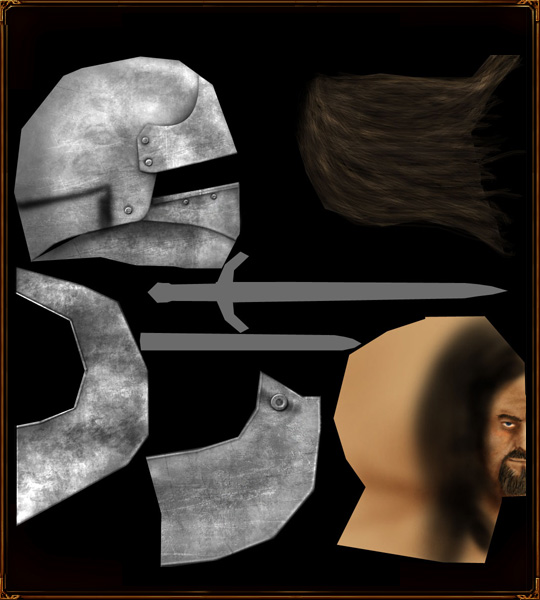 So, marking off the areas of the sword.   Hilt grip is down with a square of brown, burned to make it look like wrapping. 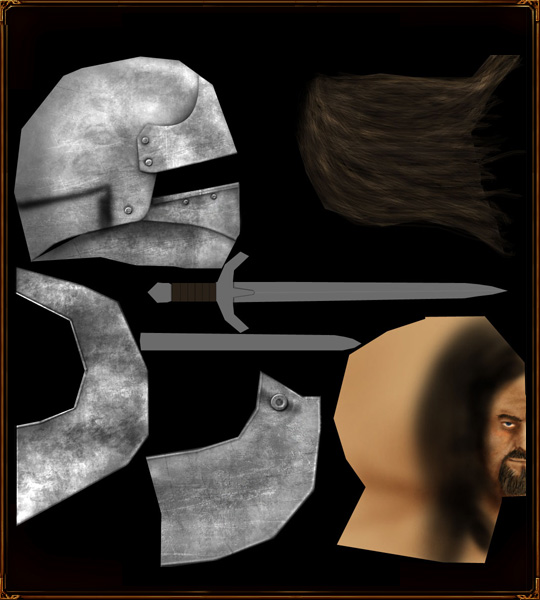 Adjusted with texture by dodging the centre of each piece.  Some further dodging.  The sword blade is uniformly dodged on one side to give depth.  The other side is only dodged a bit, and burned slightly.  Drawing some spirally symbols into the hilt.  Dodging around those symbols makes them look more indented.  The same highlight scheme as the blade is here. 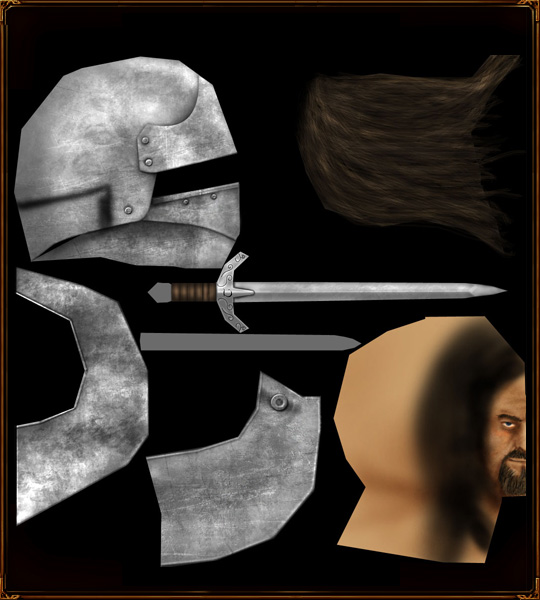  I didn't comment the production of the hilt jewel - it's just a beveled ellipse, with the facet filter applied. 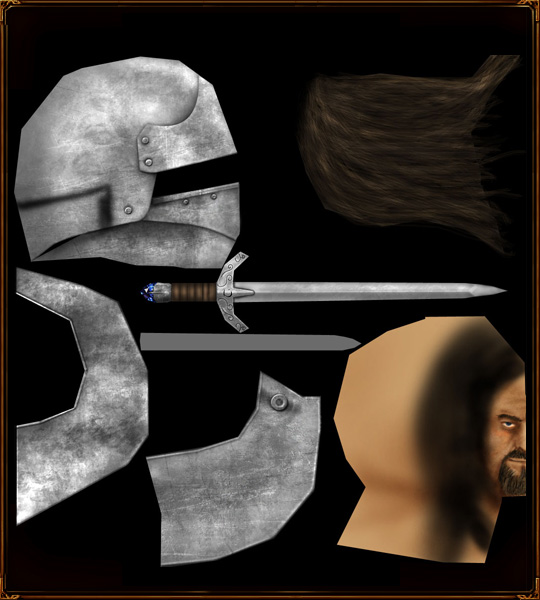 The sheath will be brown.  The method of higlighting is identical to the blade, but more subtle because it's leather.  The frog and the guide will be metal, so they're added as grey.  Same highlight scheme used on them.   This strap is the sword belt from so long ago 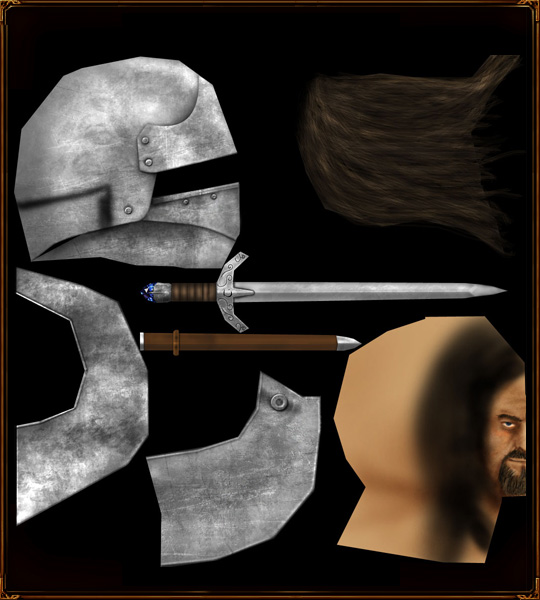 Adding a pair of studs to lock it in place.   And that concludes the tutorial! Thank you for reading. If you have any questions, you can post them in my forums and I'll answer as best I can. CommentsDisplay order: Newest first | Page: 1, 2, 3 {IP}Sauron - Thursday March 26, 2009 - 12:18 You make it look so easy :P Puppeteer - Wednesday July 2, 2008 - 10:27 I wish I understood how the pen tool works, those patterns look great but I'm finding hard to replicate Persus - Tuesday April 22, 2008 - 3:52 Can you send me a link to the splatter-brushes which you use? LotrCrushah - Saturday March 8, 2008 - 23:57 this is the best tutorial on skinning and texturing ive ever read ={D Fingulfin - Wednesday November 21, 2007 - 23:14 =O Bart (Administrator) - Wednesday September 5, 2007 - 3:09 2 hours is nothing. skinning (and other artforms) take patience Guess Who - Tuesday September 4, 2007 - 23:22 whoa 2 hours well i found out how to use the elipse tool thanx to matias. m@tt (Team Chamber Member) - Tuesday September 4, 2007 - 10:54 Not when Nertea spends at least 2 hours on a skin Guess Who - Tuesday September 4, 2007 - 2:57 make a video tutorial that would be so easy to follow ;) Juissi - Sunday September 2, 2007 - 8:52 I have Photoshop 7 and even that has it :P |
 |
|||||||||||||||||||

"One site to rule them all, one site to find them, © All Rights Reserved Eric Edwards ©2013. |
|||||||||||||||||||||


 Previous