

Lone Wolf 2 Return of Dawn is a port/sequel to Lone Wolf Return of Shadow for BFME2. |
| Welcome Guest ( Log In / Register ) |
|
 |
Quick Lists Top RatedTutorials Living World Map G Ultimate beginner' Arrow scaling bug Raising Heroes max Proper Fire Arrow Creating an asset. Simple Structure B Making a simple Ma Quick and easy sno Making patrols nea Mods The Dwarf Holds The Peloponnesian RJ - RotWK The Elven Alliance Helm's Deep Last H The Elven Alliance Special Extended E Kings of the West RC Mod The Wars of Arda Downloads BFME1 1.06 Widescr Enhanced W3D Impor Fudge's Map Pack LotR/BfME HD Logos Osgiliath Shellmap Crystals Of Ancien 2v1 Wold The forests of Dru Converted BFME2 an ROTWK animations f |
|||||||||||||||||||
 |
Register and log in to move these advertisements down Texturing the Golasgil Household Knights
This tutorial covers, in detail and with a lot of pictures, the entire texturing process of the elite troops of Langstrand. 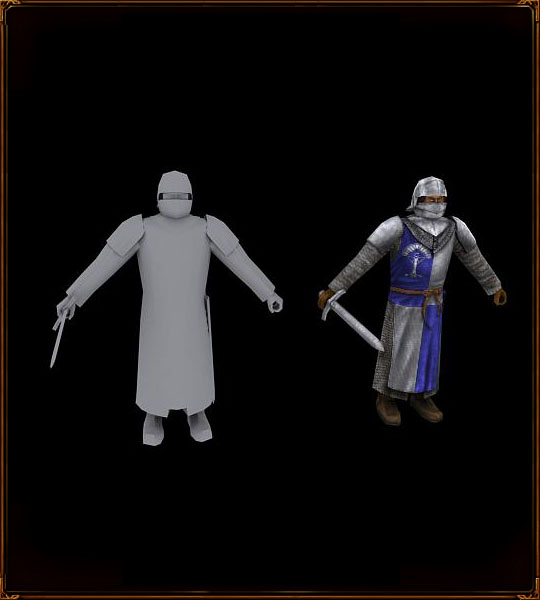 Here is my concept art for the unit. I'll be following this as best as I can 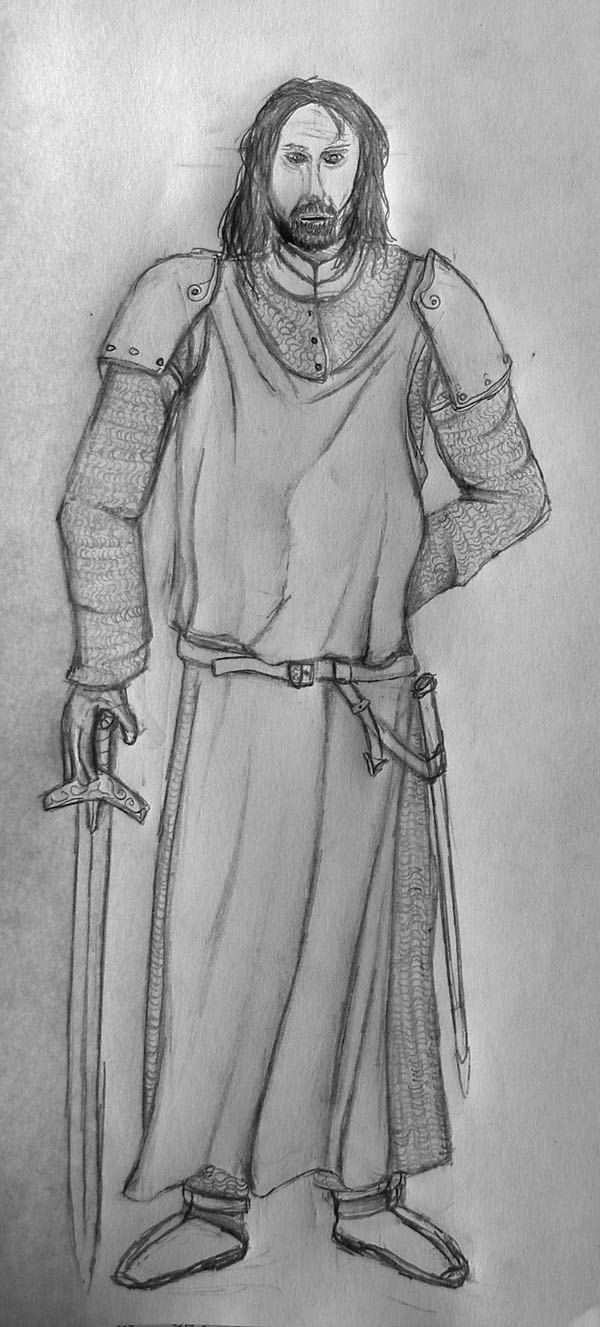 Texture Layout I previously mapped the texture to 2 separate files. One contains the body, another contains the accessories: hair, face, helmet and sword. A screenshot of each UV unwrap window left me with these two files: 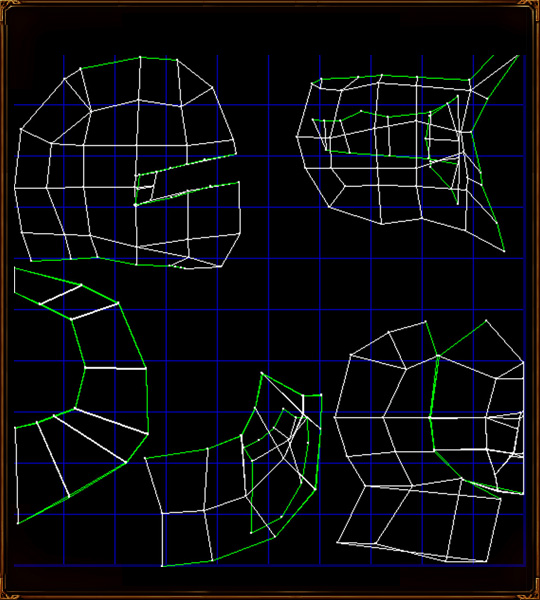 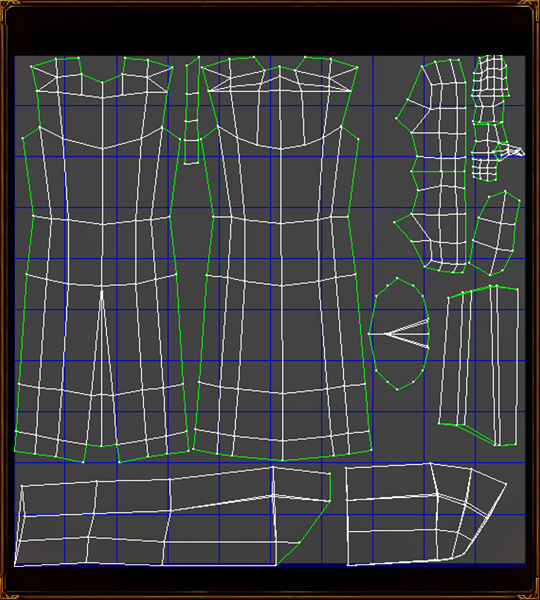 I next create a couple of layers in each document, each containing a base colour for that object, and laying out the various components of the skin as per my concept drawing.If I were modeling, this would be the blocking out stage, using placeholder objects for everything. One reason to do this is to check UV mapping edges and lay out the colour scheme properly. 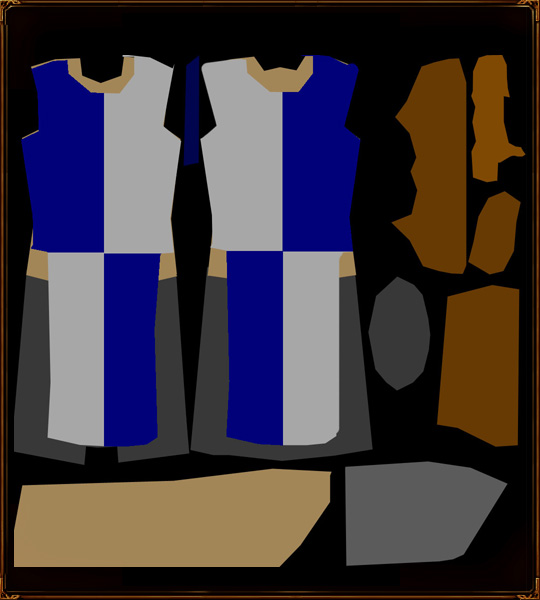 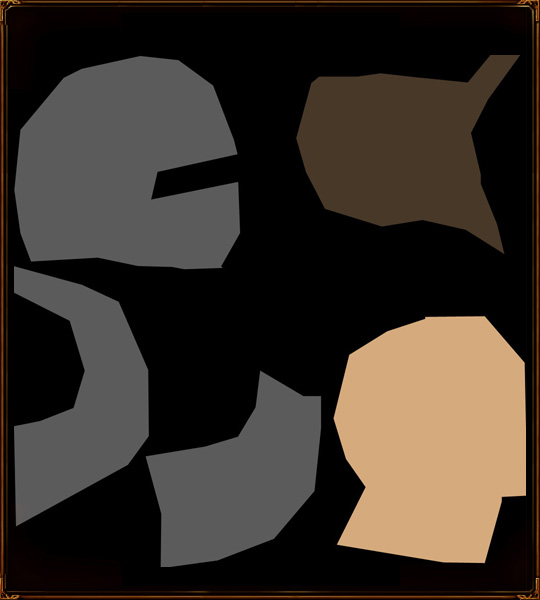 Once that is out of the way, we can begin the real work. One of the most important components of this guy, as per the concept, is the chainmail hauberk. So, Iâm going to draw some 4 to 1 style chainmail. I already have some in a seprate document, but it is showing its age, and lacking it accuracy. So, new Photoshop document, any large size will do. Iâll use 1024x1024, so I can use this later for almost any size of chainmail. Using the ellipse tool on add mode, draw a grey circle around the size of your individual ring. Then, set it to subtract mode and draw a second ellipse inside to create a ring. Rasterize the layer and squash it slightly â chainmail is almost always set at an angle. It can also be perfectly rounded, which is probably easier if you're trying to work out the precise linkages.  Next, to give easy depth, apply a bevel effect in the blending options dialog. Adjust this as you wish to create the style of ring you want. Flat, rounded, all will have different effects. Of course, each ring may only be 5 pixels high on the final texture, so you may not care at all!  Now rasterize again, to make the bevel permanent. Because there are other scales, there will be reflections, which I will draw in as a second light ring with the dodge tool  One more operation on the ring â since it is a bent piece of wire, draw in a little junction where the two ends would have met. Then, duplicate the layer and hide the duplicate, so if you screw up the next step you can come back to it. (Note: while I was trying to figure out the linkages, I screwed up completely around 3 times)  I suggest getting some references for the type of chainmail you wish to make. Since Iâm making 4 to 1, thereâs a specific linkage style Iâll use, and you should study what link style you want to determine where the layers should be placed. 4 to 1 just means 4 rings link in each one. 6 to 1 is denser and so on. Most European stuff is 4 to 1, so it's the most reasonable for Middle-Earth textures. 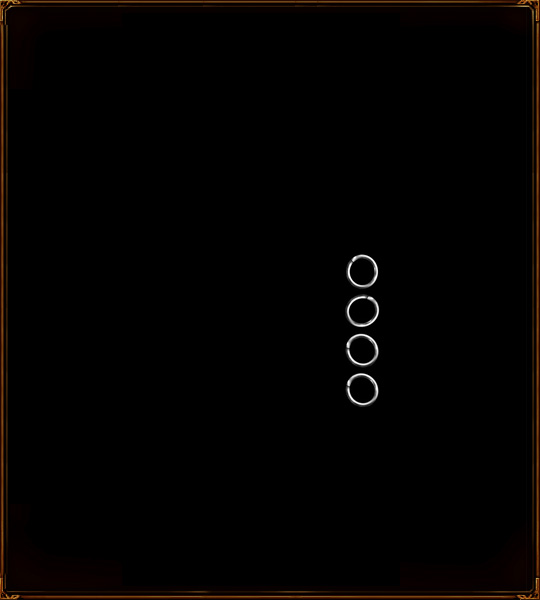 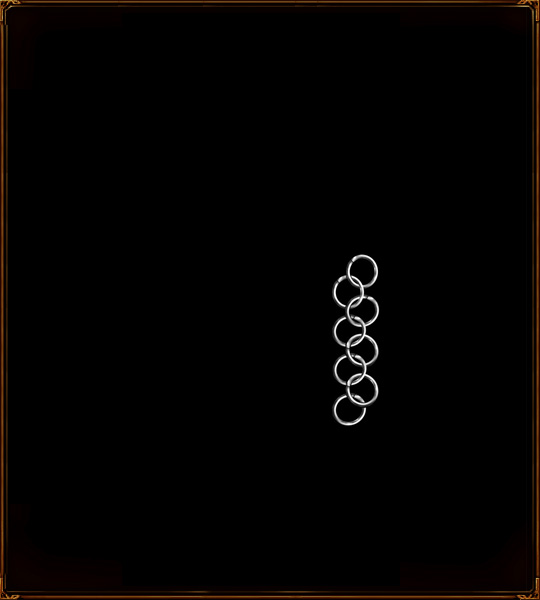 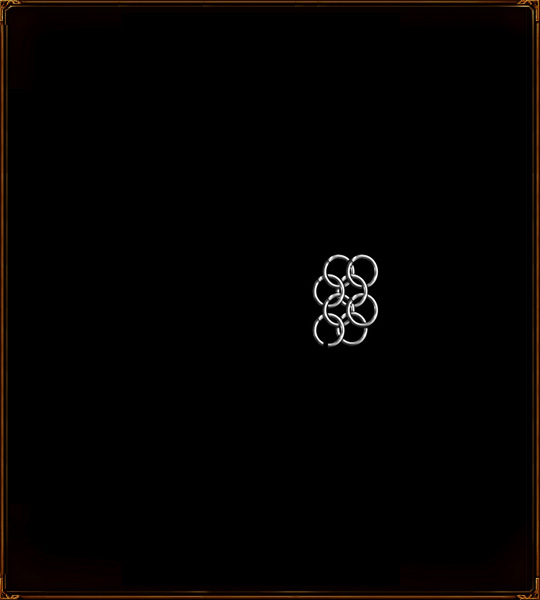 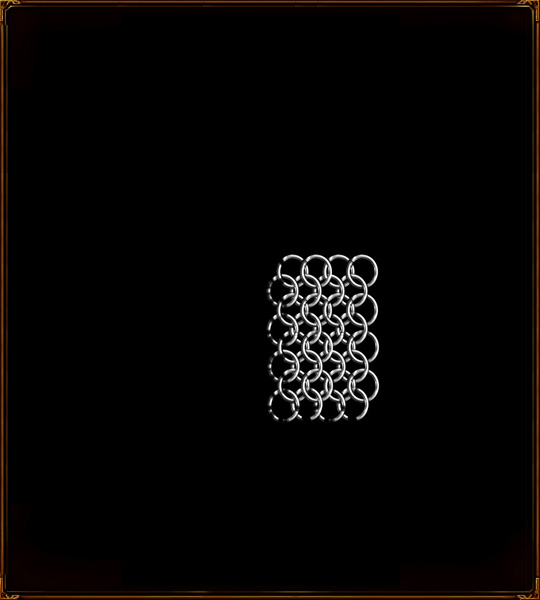 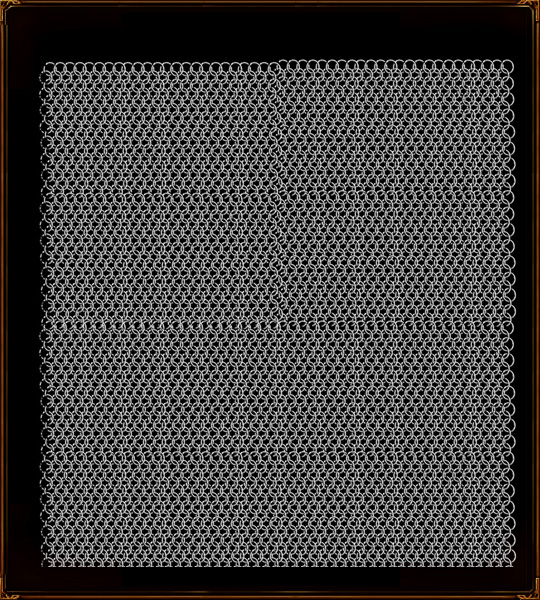 And the chainmail is pretty much done at this point. CommentsDisplay order: Newest first | Page: 1, 2, 3 Rob38 (Team Chamber Member) - Sunday June 17, 2007 - 19:36 What can I say Nertea!? You truly are a pro with Photoshop! ched (Team Chamber Member) - Saturday June 16, 2007 - 7:02 on page 2, there's a broken image, namely surcoatb5.jpg Nertea (Team Chamber Member) - Friday June 15, 2007 - 16:34 I'll release the model and skins, (in tga, not psd I'm afraid) when I finish enough fiefdom units for Southern Fiefdoms Model Pack #2. Bart (Administrator) - Friday June 15, 2007 - 15:39 How long did this (the tutorial and the art itself) take you to do? Awesome stuff, a real boost for this new site. Bebbe - Friday June 15, 2007 - 13:16 As told on MSN, so FRICKIN' awesome. Hostile (Administrator) - Friday June 15, 2007 - 12:58 This is the money shot. The absolute best tutorial on skinning I have ever seen. I will link this to my favorites. Unbelieveable, to see it all unfold image by image. |
 |
|||||||||||||||||||

"One site to rule them all, one site to find them, © All Rights Reserved Eric Edwards ©2013. |
|||||||||||||||||||||


