

Enhances Visuals, provide series of modifications and additions to the game play, support WOR |
| Welcome Guest ( Log In / Register ) |
|
 |
Quick Lists Top RatedTutorials Living World Map G Ultimate beginner' Arrow scaling bug Raising Heroes max Proper Fire Arrow Creating an asset. Simple Structure B Making a simple Ma Quick and easy sno Making patrols nea Mods The Dwarf Holds The Peloponnesian RJ - RotWK The Elven Alliance Helm's Deep Last H The Elven Alliance Special Extended E Kings of the West RC Mod The Wars of Arda Downloads BFME1 1.06 Widescr Enhanced W3D Impor Fudge's Map Pack LotR/BfME HD Logos Osgiliath Shellmap Crystals Of Ancien 2v1 Wold The forests of Dru Converted BFME2 an ROTWK animations f |
|||||||||||||||||||
 |
Register and log in to move these advertisements down How to Make an EA Quality Map
TEXTURING Right... this is where you can really make a map stand out visually. Please note though, that my methods are unusual, this is not the way EA or other good mappers texture, but the results are pretty good and IMO it's easier to control. Also note that I am now taking screenshots from my Old Ford of Anduin 2 map. First step is to by the side of the map, make a grid of all the textures you plan to use. 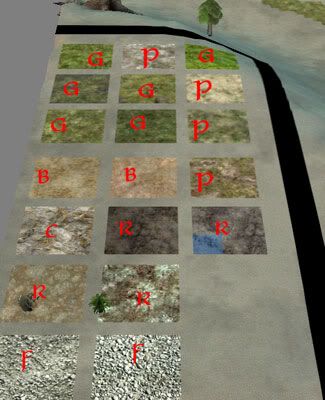 G = Grass, P = Paths, C = Cliff, B = Beach, F = Ford, R = Riverbed This should provide me with a good mix of textures. For me, it is vitally important that a map does not look monotextured so I always make sure I use a variety of textures. It makes the world of difference, but takes a lot longer to do. One thing you may want to do straight away is remove all that default grey texture. DONâT!!! The grey is your friend. What I do is add all the secondary textures in isolated patches, then add the base texture last, filling in all the grey, before blending. Doing it this way ensures that everything gets blended properly, and it also avoids the majority of three-way-blends. So, I start with paths, cliffs and rivers, then do the main part (usually grass, though it depends on the map). Paths Paths should have 2 or 3 textures. One main texture, one texture between the path and grass (so the change isn't unrealistically obvious) and maybe a third for little spots on top of the main texture. I start by outlining the linking texture (size 2 brush, try to make the gap at least 2 as well). Avoid straight sections of pathing, and have paths going to all important points on the map (bases, neutral buildings, fords etc). 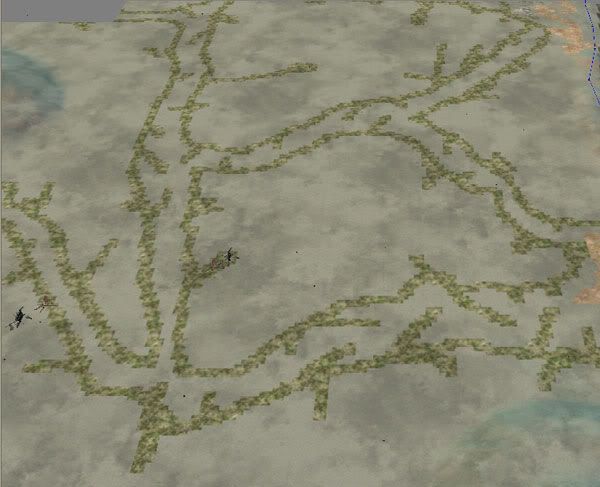 As long as the path is completely enclosed, you can use the Fill Bucket to fill in the main texture. Do not blend (yet). 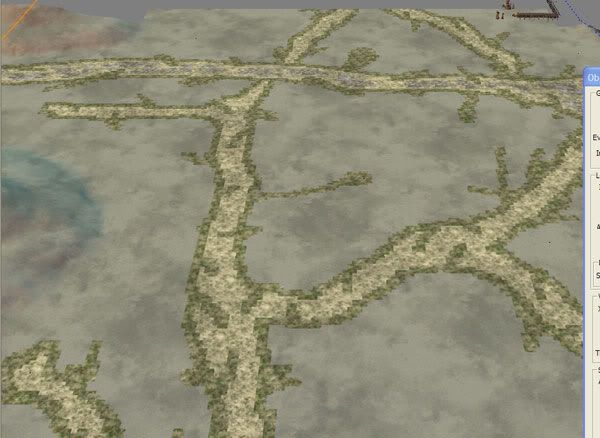 Although I didn't have a third texture for the main paths, I did have one for the Old Forest Road path (the one by the top) where I had a grassy/stony texture. Rivers Have a base texture of either dirt or smooth rock/cliff. My inspiration picture had brown banks, so I used MirkwoodDirt. I then added RohanRock5 to add some variation. Remember that it's difficult to see through water, so the change won't be that obvious, but you don't want flat water. Blend out the second texture when done. 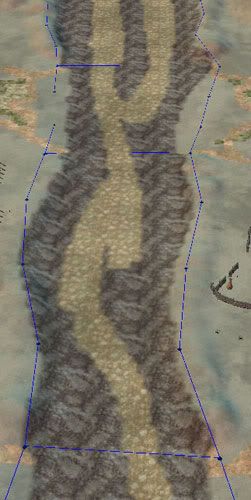 I then added another texture which is even rockier (blend when done): 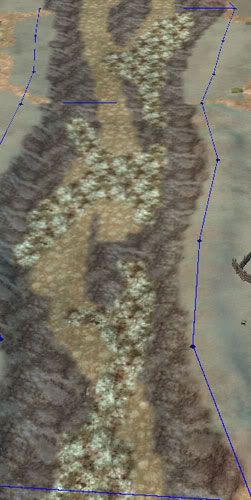 For fords, pop over to the "Lakes, Rivers, Fords" page where I give an explanation on how to make good looking fords (Including the texturing part). My final result for this map (different to the one on the Fords page) looks like: 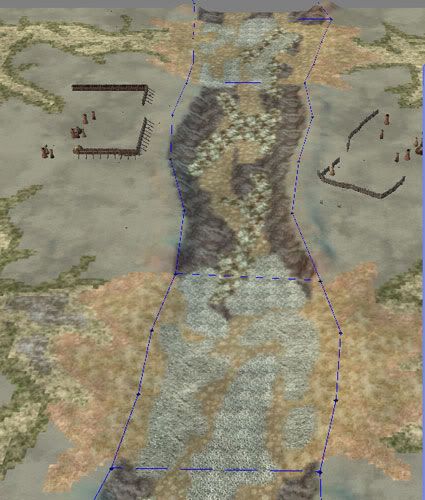 Cliffs For small bits of cliffs, just use one or two textures (cliffs or rocks) and add to where-ever you want and blend out.  For larger areas, though, you need more though else it will look monotextured. Choose 3 or 4 textures. Pick one of them to be your base texture. With the base texture, with a sized 2 brush, paint around the edge of the mountainous area. 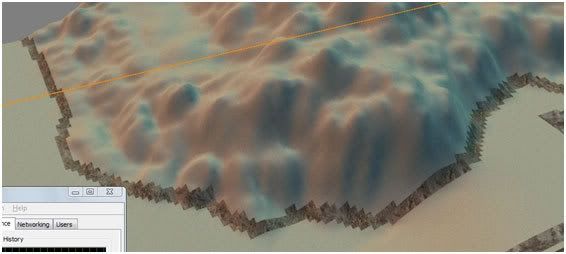 Now chose a different texture and paint random shapes into the area. As these areas are usually quite small, I paint small shapes. 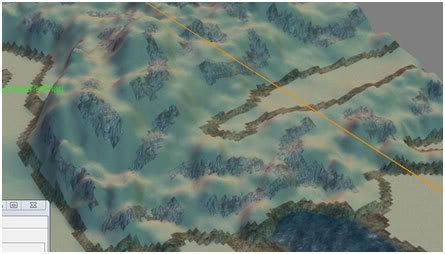 Then do it again with another texture. I avoid having them touching to cut down on blending (you'll see why in a minute), but with BFME II's Worldbuilder, pressing SHIFT whilst blending will blend all instances of the blended texture which means you can be a bit more messy with your texturing, however watch for 3-way-blends. 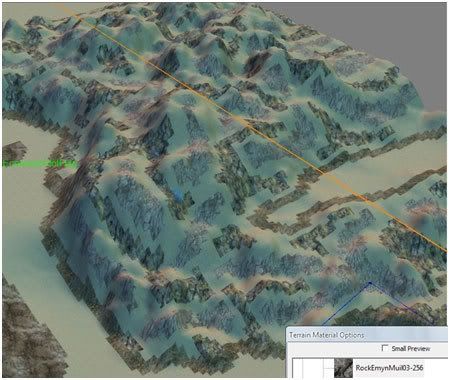 Now reselect the base texture and use the fill bucket to fill in the grey. Then blend-out the base texture. *has no screenshot of this* The main land Pick a base texture and several other (4ish) secondary textures and maybe a handful of others that only appear every now and again. Here I use a similar technique to what we've just seen. Expect I paint much larger shapes. Keep using the 2 sized brush, and do not blend. 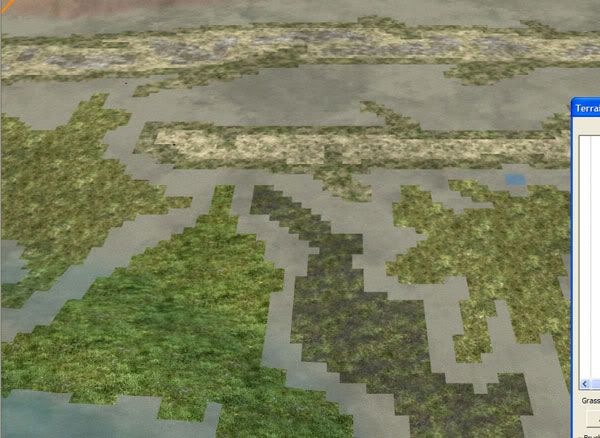 Because they are bigger, you can add another texture on top (don't touch the edge). You can blend these textures. 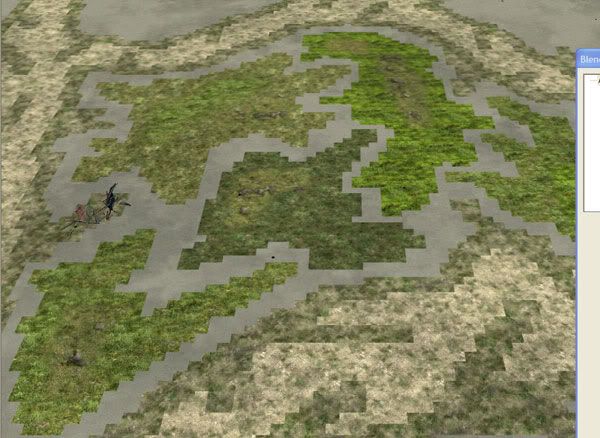 Once you have a lot of variety, select the base texture, fill it in and blend it (the base texture). That will blend all the big shapes and will save you a bit of time. 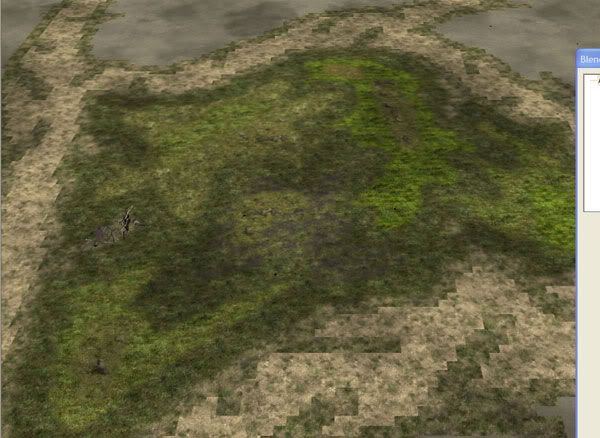 The above example was for a closed bit of land, but with large areas this can still be very time consuming. But it is worth it. BTW, if you don't like the look (I actually switched base texture after taking the screenshots), it is easy to repaint - you fill in a texture with another one (hold SHIFT at the same time to replace all instances). When done, you can then blend all the unblended bits, such as the inner paths (as the outer path texture will be blended when you blend the base texture), or you can blend the outer path instead (of the inner path), depending if this makes your path look better. When fully done...  CommentsDisplay order: Newest first | Page: 1, 2 Harrylotr - Sunday December 19, 2010 - 2:12 You're awesome!! Thanks... Yiio - Friday August 20, 2010 - 15:53 rom were can idonload this worldbuilder? Lord Eniam - Monday February 22, 2010 - 20:06 Very well explained. Thank you. m@tt (Team Chamber Member) - Sunday October 11, 2009 - 15:06 It's a castle for BFME 1. The smaller one is a camp, the even smaller one is an outpost/expansion. Windrider - Saturday October 10, 2009 - 14:07 the large black circles with the directions - what do they do? How about the smaller black circles with the red font and the 3 meshed black circles? {AE}Manveru - Thursday September 3, 2009 - 6:32 @militaryman: That's part of WB. It only shows some tiles in an effort to cut down on the resource usage. If you want to enable the full map even when showing many tiles, go to View -> Show All of 3D Map (Or press Ctrl+A). militaryman - Sunday August 23, 2009 - 14:47 Ok. i have a problem with world builder. when i go to zoom out i cannot see the terrain in some parts. an example of this is on page 4 of this article(where it tells you this "When everything's added (screenshot doesn't include creeps for some reason):" the picture bellow this is my problem {AE}Manveru - Wednesday April 1, 2009 - 17:46 Thanks SO much! I can finally make maps that actually work! tank_builder - Thursday March 19, 2009 - 18:36 Arg!!! i dont have the player list and team!!! please help. Ridder Blauw - Saturday December 27, 2008 - 9:17 This article is really helping me out, thanks ;) |
 |
|||||||||||||||||||

"One site to rule them all, one site to find them, © All Rights Reserved Eric Edwards ©2013. |
|||||||||||||||||||||


 Previous